
Ariston Clas HE: Fan Assembly Replacement And Air Pressure Switch Testing
The Ariston Clas HE boiler relies on a fan and an air pressure switch to ensure safe combustion. These components work together to expel flue gases and verify that fresh air is entering the burner. When the fan fails to create airflow or the switch cannot detect it, the boiler shuts down immediately. This safety measure prevents dangerous gases from leaking into the property.
You'll need a systematic approach to resolve these airflow issues efficiently. Most lockouts involve a mechanical motor failure or a blocked sensing line. This guide explains how to perform a professional fan assembly replacement and how to test the associated safety interlocks. We'll cover everything from winding resistance checks to post-repair combustion analysis.
How The Fan And Air Pressure Switch System Works
The fan assembly pulls air through the combustion chamber to support the flame. As it spins, it creates negative pressure that the air pressure switch monitors. A small tube, known as the venturi tube connection, carries this pressure signal to a sensitive diaphragm inside the switch. The switch must close its electrical contacts before the boiler is allowed to fire.
This interlock is the first line of defence against dangerous combustion failure. If the fan speed drops or the flue becomes restricted, the contacts will remain open. The boiler will then display an error code, typically A01 or A02 on Ariston Clas HE models. Understanding this relationship is vital for an accurate fan assembly replacement diagnosis.
Diagnostic Testing Before Replacement
You must verify which component has actually failed before ordering parts for the repair. Listen for the fan during the initial startup sequence after you reset the boiler. A healthy fan produces a smooth whooshing sound and accelerates rapidly. If you hear grinding or rattling, the bearings have likely worn out and the motor needs attention.
Check the voltage at the fan connector during the call for heat. The Ariston Clas HE should supply approximately 230V AC to the motor. If power is present but the fan does not spin, the motor has failed. If there is no power from the board, you may have a control fault. Heating and Plumbing World provides these technical insights to help you achieve a first-time fix.
Measuring Fan Motor Winding Resistance
You can confirm a motor failure by checking the internal coil integrity with a multimeter. Turn off the power and disconnect the electrical plug from the fan housing. Set your meter to the ohms scale and measure across the main terminals. A functioning motor will show a consistent fan motor winding resistance reading.
If your meter shows infinite resistance or zero ohms, the windings have shorted or snapped. This electrical failure is often caused by years of thermal stress or moisture ingress. Recording the fan motor winding resistance helps you prove the component is faulty to the customer. Once you confirm a failed motor, you can proceed with the fan assembly replacement.
Testing The Air Pressure Switch
The air pressure switch can fail mechanically even if the fan is working perfectly. You can test the switch by removing the sensing tubes and applying very gentle suction. Use a multimeter to check for continuity across the electrical terminals while the diaphragm is flexed. The switch should click and show zero ohms immediately.
If the switch doesn't respond to suction, it's failed mechanically. If it responds but the boiler won't fire, you should check the wiring harness. On a recent project, I found a boiler where the fan was new, but the system still locked out. I found a tiny piece of insulation material blocking the venturi tube connection inside the fan housing. Clearing the tube resolved the issue without needing more parts.
Think of the differential pressure switch like a safety gate at a level crossing. The gate won't open for the train until the track sensor confirms the path is clear. If the sensor is blocked by debris, the gate stays shut to prevent an accident. You must ensure the airflow signal can reach the sensor through a clear path for the boiler to operate.
Fan Assembly Removal Process
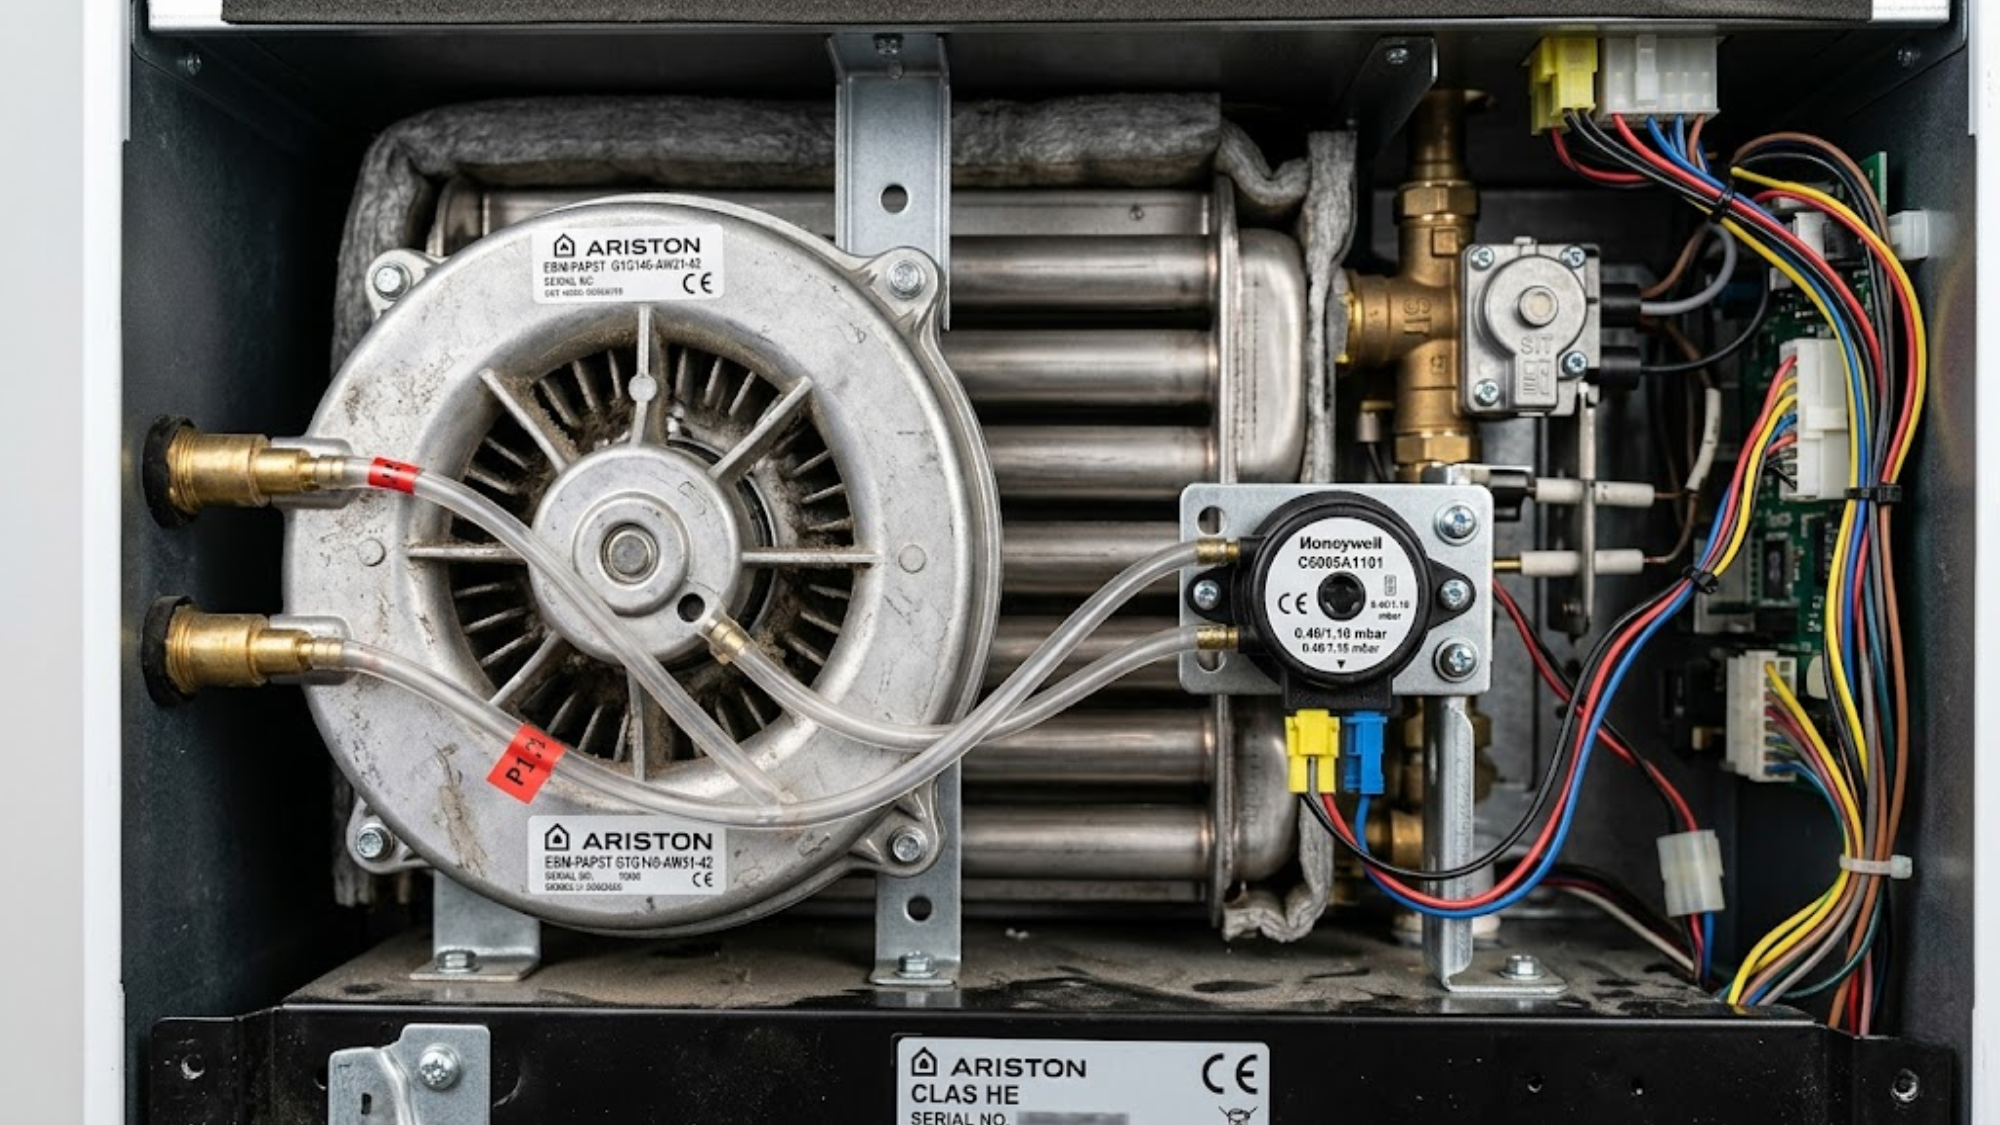
Start the fan assembly replacement by isolating the electrical power and closing the gas valve. Remove the boiler's front cover by unscrewing the bottom panels and lifting upward. The fan is located on the left side of the combustion chamber. It is easily identified by its circular housing and electrical plug.
Disconnect the sensing tubes from the fan nipples carefully. These tubes often become brittle in high-heat zones and can snap if they are handled roughly. If you are working on an older combi boiler, you should check the tubes for any hairline cracks before reassembly. Unplug the fan connector and remove the four screws securing the unit to the chamber plate.
Installing The New Fan Assembly
New fan assemblies for the Ariston Clas HE usually come with a fresh combustion chamber gasket. You must always use the new seal even if the old one looks serviceable. Compressed gaskets don't provide a reliable gas-tight seal when they are reused. This can lead to dangerous flue gas leaks inside the boiler casing.
Position the new combustion chamber gasket on the metal face and align the screw holes. Slide the new fan into position and thread the mounting screws by hand. This prevents cross-threading into the soft aluminium heat exchanger. Tighten the screws in a cross-pattern to 3Nm. Using quality boiler replacement parts ensures the repair meets manufacturer safety standards.
Air Pressure Switch Testing After Installation
You must verify the pressure switch operates correctly with the new fan before closing the casing. Connect a digital manometer to the switch port to measure the pressure in Pascals. Restore power and initiate a call for heat. The fan should start immediately.
The Ariston Clas HE pressure switch typically closes at 45 to 55 Pascals. If the pressure builds but the boiler still won't fire, the differential pressure switch has likely failed. You can find a range of central heating components for Ariston units in our stock. If you need to replace the switch, ensure you use the factory-calibrated version for this specific model.
Post-Installation Verification
With everything reassembled, run the boiler through a complete heating cycle. Monitor for clean ignition within five seconds of the fan starting. Use a combustion analyser to verify the air-fuel ratio at full fire. The Ariston Clas HE should produce CO2 readings of 8.5% to 9.5% with CO below 100 ppm.
Check the heating system components for any unusual vibration or noise during operation. If the unit sounds loud, investigate potential mechanical imbalances or loose mounts immediately.
You should also verify that the heating controls are calling for heat correctly. If the combustion readings are outside the range, you may need to adjust the gas valve settings. A successful fan assembly replacement requires this final safety check.
Conclusion
Fan and air pressure switch failures account for many no-heat calls on Ariston boilers. By testing the fan motor winding resistance and the sensing tubes, you can avoid misdiagnosis. Always use genuine parts and new gaskets to ensure the long-term safety of the appliance.
Regular servicing helps identify failing bearings before they cause a total system shutdown. If you encounter a complex airflow fault or need specific advice, you can contact our support team for technical assistance. We are here to help trade professionals keep their customers' heating systems running safely and efficiently.