
DIY Guide to Lagging Pipes for Insulation
Properly insulating your home's pipework is one of the most cost-effective improvements any homeowner can undertake. Whether protecting against freezing temperatures in winter or reducing heat loss from hot water pipes, pipe lagging insulation delivers immediate benefits whilst requiring minimal investment. This comprehensive guide walks through everything needed to complete DIY pipe insulation successfully, from selecting materials to avoiding common installation mistakes.
Understanding Pipe Lagging and Its Importance
What Is Pipe Lagging Insulation
Pipe lagging insulation consists of protective materials wrapped around pipework to create a thermal barrier. This barrier serves multiple purposes: preventing heat loss from hot water pipes, stopping cold water pipes from freezing during winter, and eliminating condensation that can damage surrounding structures. The insulation works by trapping air within its structure, which acts as an effective insulator against temperature transfer.
For UK homeowners, the benefits extend beyond frost protection. Properly lagged hot water pipes retain heat more efficiently, meaning water arrives at taps hotter whilst using less energy. This translates to lower heating bills and reduced carbon emissions - a win for both household budgets and the environment.
When and Where to Insulate Pipes
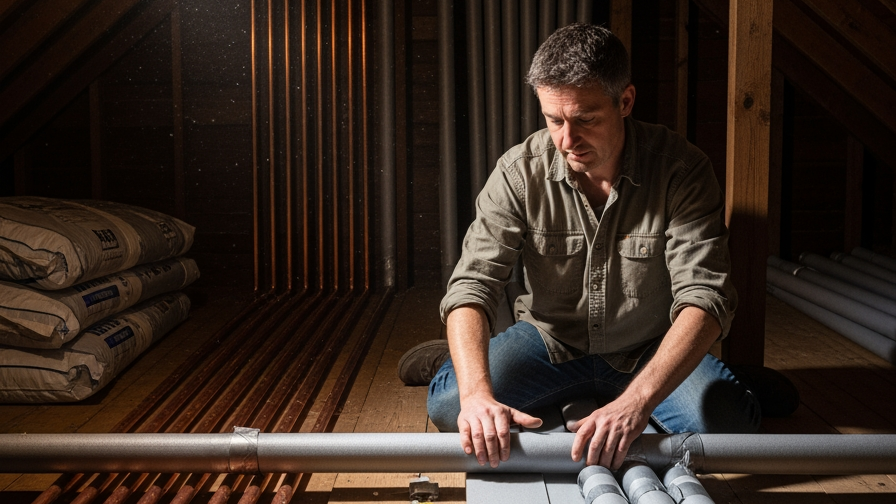
Priority areas for DIY pipe insulation include any pipework in unheated spaces such as lofts, basements, garages, and along external walls. These locations experience the greatest temperature fluctuations and pose the highest risk for freezing or excessive heat loss. Cold water pipes in these areas require insulation primarily for frost protection, whilst hot water pipes need lagging to maintain temperature and improve energy efficiency.
Pay particular attention to pipes serving expansion vessels and other heating system components, as these often run through vulnerable spaces. External pipe runs and those in poorly insulated areas should be first on your installation list.
Types of Pipe Insulation Materials
Foam Pipe Insulation
Foam sleeves represent the most popular choice for DIY projects due to their ease of installation and reasonable cost. These pre-formed tubes slip over pipes and feature a lengthwise slit for simple fitting. Available in various diameters and thicknesses, foam pipe insulation suits most domestic applications and provides excellent thermal performance for standard heating and plumbing installations.
Heating and Plumbing World stocks foam pipe insulation in multiple sizes to match common pipe diameters. The material cuts easily with a sharp knife, making it ideal for DIY installations where precise fitting matters.
Fibreglass and Mineral Wool Options
For situations requiring superior thermal performance, fibreglass and mineral wool insulation materials offer enhanced protection. These professional-grade options provide better insulation values but require more careful handling during installation. Fibreglass can irritate skin and airways, so appropriate protective equipment becomes essential when working with these materials.
Mineral wool insulation particularly suits high-temperature applications, such as pipes connected to older heating systems or those serving commercial-grade equipment. The material's fire-resistant properties add an extra safety dimension for installations near boilers or other heat sources.
Insulation Tape and Wraps
Insulation tape serves as a supplementary solution for awkward pipe sections where standard sleeves prove difficult to install. These wraps work well around bends, joints, and valves, though they generally provide less insulation than foam sleeves. Use tape primarily for filling gaps between sleeve sections or protecting short pipe runs where full sleeves aren't practical.
Tools and Materials Needed for DIY Pipe Insulation
Essential Equipment Checklist
Successful pipe lagging requires surprisingly few tools. A sharp utility knife or scissors for cutting insulation, measuring tape for accurate sizing, and PVC tape or cable ties for securing insulation comprise the basic toolkit. For working in confined spaces like lofts, a torch and knee pads improve comfort and visibility during installation.
Safety equipment matters when handling certain insulation materials. Gloves protect hands from irritation, whilst a dust mask prevents inhalation of fibres when cutting fibreglass or mineral wool products. Safety glasses guard against particles during cutting operations.
Calculating Material Quantities
Accurate measurement prevents wasteful trips to the supplier or frustrating shortages mid-project. Measure the total length of pipes requiring insulation, then add 10-15% to account for cutting waste and mistakes. Note the diameter of each pipe section, as insulation must match pipe size for proper fit and effectiveness.
Don't forget to account for fittings, valves, and bends. These areas often require extra insulation tape or specially cut pieces to achieve complete coverage. Recording pipe locations and dimensions on a simple sketch helps ensure you purchase adequate materials for the entire installation.
Step-by-Step DIY Pipe Lagging Installation Guide
Preparing Pipes for Insulation
Begin any pipe lagging insulation project by thoroughly cleaning pipe surfaces. Dust, grease, or moisture between pipes and insulation reduces thermal performance and may cause adhesion problems with tape seals. Wipe pipes with a dry cloth, allowing any damp areas to dry completely before proceeding.
Inspect pipes for signs of corrosion, leaks, or damage during preparation. Address any issues before insulating, as pipe lagging conceals problems that may worsen undetected. Check connections to pressure relief valves and other fittings, ensuring all joints remain sound and leak-free.
Installing Foam Pipe Sleeves
Cut foam sleeves to length using a sharp utility knife, making clean, straight cuts for neat joints between sections. Open the lengthwise slit and wrap the insulation around the pipe, ensuring the slit faces downward or sideways to prevent moisture entry from above. This orientation proves particularly important for outdoor installations or pipes in damp locations.
Secure the slit with PVC tape at regular intervals - typically every 300-500mm along the pipe run. At joints between insulation sections, butt the ends together tightly without gaps, then wrap tape around the junction to create a continuous seal. This prevents cold spots where heat loss or freezing might occur.
Insulating Difficult Areas
Valves, elbows, and T-junctions present challenges for standard sleeve installation. For these areas, carefully cut insulation at 45-degree angles to create mitred joints around bends, or use shorter sections wrapped with insulation tape. The goal remains complete coverage without gaps, even if the appearance becomes less tidy in complex areas.
Tight spaces between pipes and walls may require thinner insulation or creative cutting. Where standard sleeves won't fit, wrap pipes with insulation tape, overlapping each layer by half the tape width. Multiple layers provide adequate protection when proper sleeves prove impractical.
Common Mistakes to Avoid
Installation Errors That Reduce Effectiveness
The most frequent mistake in DIY pipe insulation involves leaving gaps in coverage. Even small exposed sections create cold spots where freezing can occur or heat escapes. Pay special attention to joints, bends, and fittings, ensuring every millimetre of pipe receives protection.
Using insulation that's too thin for the application represents another common error. In particularly cold areas like unheated lofts, standard 13mm wall thickness may prove insufficient. Consider 20mm or thicker insulation for exposed pipes in harsh environments. Similarly, undersizing insulation diameter creates compression that reduces thermal performance.
Choosing Wrong Materials for the Location
Indoor pipes in dry, temperature-stable environments tolerate standard foam pipe insulation without issues. However, outdoor installations or pipes in consistently damp areas require closed-cell foam or other moisture-resistant materials. Standard open-cell foam absorbs water, losing insulation properties and potentially promoting corrosion.
For pipes serving water tanks in lofts or basements, ensure insulation extends fully to connection points. Exposed sections near tanks or vessels create vulnerability points where freezing damage often begins during severe weather.
Maintaining Your Pipe Insulation
Regular Inspection Schedule
Inspect pipe lagging annually, ideally before winter when frost protection becomes critical. Look for signs of damage such as compression, tears, or sections that have slipped away from pipes. Compressed insulation loses effectiveness as the air pockets that provide thermal resistance are eliminated.
Check tape seals at joints and slits, replacing any that have loosened or degraded. UV exposure affects outdoor insulation, causing brittleness and cracking. Replace compromised sections promptly to maintain continuous protection across the entire pipe run.
Signs Your Insulation Needs Attention
Visible condensation on previously dry pipes indicates insulation failure or inadequate coverage. This often occurs where gaps develop at joints or where insulation has compressed significantly. Similarly, frozen pipes, despite apparent insulation, suggest problems requiring investigation and correction.
Increased heating costs without other obvious causes may point to degraded hot water pipe insulation. Heat loss through damaged lagging forces boilers to work harder, consuming more fuel whilst delivering less efficient service. Addressing insulation issues restores efficiency and reduces energy expenditure.
Conclusion
Completing DIY pipe insulation represents an achievable project that delivers lasting benefits through reduced energy costs and enhanced frost protection. By selecting appropriate insulation materials, following proper installation techniques, and avoiding common pitfalls, homeowners can successfully lag their pipework to professional standards. The modest investment in time and materials pays dividends through improved comfort, lower bills, and peace of mind during cold weather.
Whether tackling a complete home pipe insulation project or addressing specific vulnerable areas, the techniques outlined provide a solid foundation for success. For advice on materials or assistance with more complex installations, contact us to discuss your specific requirements with experienced professionals.