
Filling Loop Installation: Sealed System Pressure Maintenance Procedures
A cold house on a winter morning often means one thing, which is that your boiler has lost pressure. I have lost count of how many emergency callouts I have attended where the fix took two minutes and a filling loop. It is the most common issue homeowners face with sealed heating systems, yet most people do not understand how these simple devices work.
Your central heating system operates as a sealed circuit, maintaining water pressure between 1.0 and 2.0 bar during normal operation. When pressure drops below this range, your boiler shuts down as a safety measure. That is where a filling loop comes in because it is the only approved method for reintroducing mains water into your sealed system. Understanding filling loop installation is not just about fixing a problem quickly. It is about maintaining system efficiency, preventing damage, and avoiding expensive callout fees.
What Makes a Filling Loop Essential
Every sealed heating system loses pressure over time. It is not a fault; it is physics. Microscopic air bubbles escape through automatic air vents, water evaporates through the expansion vessel membrane, and tiny amounts seep past radiator valve glands. Over months, this gradual loss drops your system below operating pressure. Without a filling loop, you would need a plumber every time this happened.
Think of a filling loop like a temporary drawbridge between two separate islands. One island is your clean mains water, and the other is your central heating circuit. You only lower the bridge when you need to send supplies across, and you lift it back up to keep both territories safe and separate. This controlled connection allows you to restore pressure safely whenever needed. Heating and Plumbing World provides WRAS-approved components to ensure your system remains compliant and safe.
Types of Filling Loop Configuration
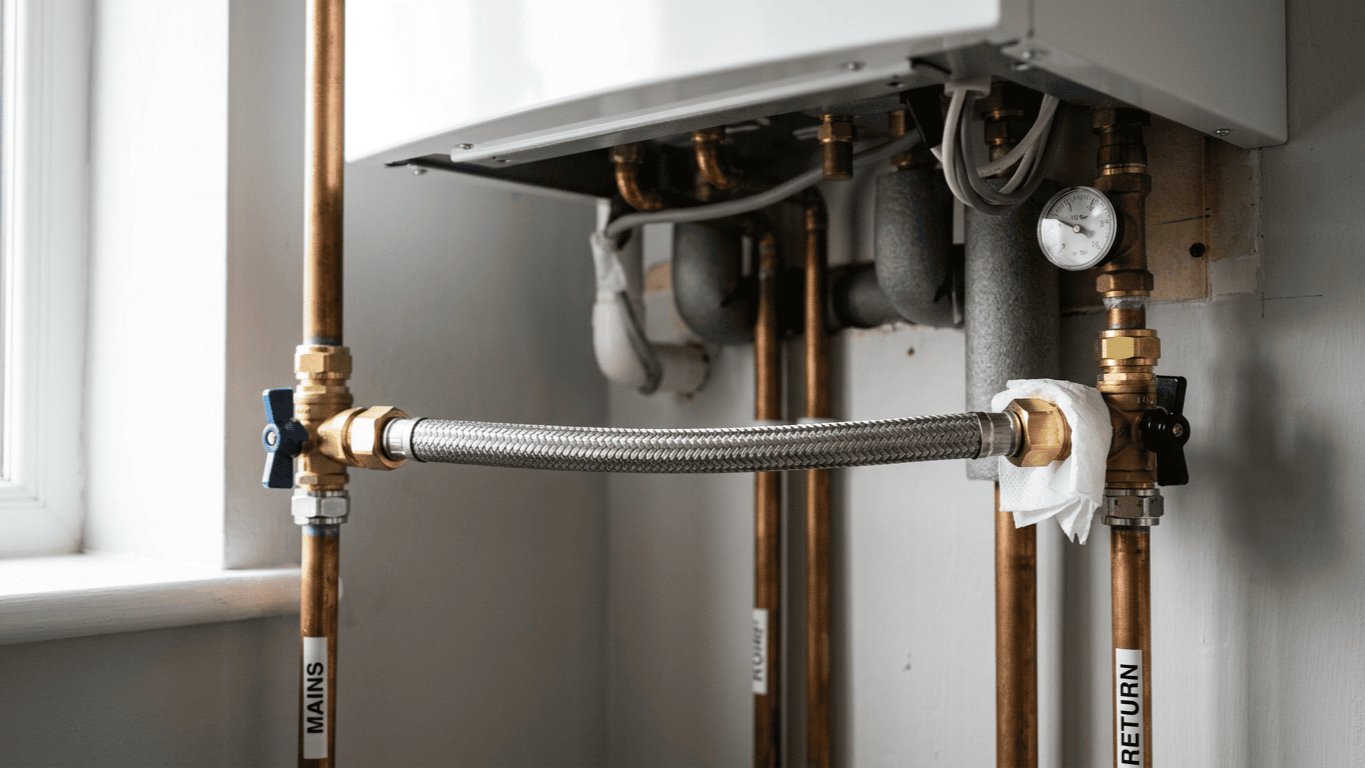
You will encounter three main filling loop designs in UK properties, each with specific installation requirements and use cases. Flexible braided filling loops represent the current standard. These consist of a braided stainless steel hose with inline valves at both ends and 15mm compression fittings. They are designed to be disconnected after use.
On a commercial project last year, I visited a property where a DIY enthusiast had replaced a flexible loop with a permanent copper pipe, believing it was a professional upgrade. Unfortunately, without a double check valve, he was risking cross-contamination of his drinking water. This led to a stern warning from the local water authority and a required re-installation of a compliant loop. This is a reminder that while you might be working on a close-coupled WC suite or a heating circuit, the water regulations apply to the whole property.
- Keyed Filling Loops: These require a special key to operate, making accidental operation by children virtually impossible.
- Built-In Filling Loops: These are integrated into some modern boiler designs from manufacturers like Worcester Bosch.
- Flexible Braided Filling Loop: The industry standard for retrofitting and general maintenance.
Pre-Installation Assessment and Planning
Before touching any tools, you need to identify the correct connection points on your system. Most installations connect to the flow and return pipes near the boiler. Check your boiler manufacturer's instructions first. Some systems have specific requirements about filling loop placement. For instance, if you are integrating a Kingspan indirect Combi Fortic tank, you must ensure the fill point is accessible for future maintenance.
You will need to verify the pipe diameter, which is usually 15mm. Ensure you have the correct compression fitting components and WRAS approval for all new valves. Turn off your boiler completely before starting work to avoid scalding risks. You should also shut off the mains water supply to your property, as unexpected flow makes proper installation nearly impossible.
Step-by-Step Installation Procedure
Start by preparing the connection points on your heating system's flow and return pipes. Clean the pipe ends thoroughly with wire wool or emery cloth. Any debris prevents a proper compression fitting seal and causes leaks. This step takes 30 seconds but prevents most post-installation problems.
Slide the compression nut onto the pipe and add the olive approximately 10mm from the pipe end. Insert the pipe into the filling loop valve body until it bottoms out, then hand-tighten the nut fully. Use an adjustable spanner to turn the nut one complete turn beyond hand-tight. Repeat this for the second valve. The two valves should align so the flexible hose connects between them without twisting. Connect the braided filling loop between the two valves and hand-tighten the 3/4" BSP threads before giving them an additional half-turn.
Pressure Testing and System Filling
With all connections complete, turn your mains water supply back on and check every joint carefully. Look for water droplets around compression nuts. Tighten any weeping joints by a quarter-turn at a time. If you are also maintaining gas appliances, ensure your oxygen depletion pilot is not disturbed during pipework adjustments.
Open both filling loop valves slowly. You will hear water flowing into your heating system. Watch the pressure gauge on your boiler. It should rise steadily toward the target range of 1.0 to 1.5 bar when the system is cold. Never exceed 2.0 bar on a cold system. Rapid filling can shock the system and damage the expansion vessel. Once you reach the correct pressure, close both valves firmly. Disconnect the hose if it is a detachable system to ensure you comply with Water Supply Regulations.
Post-Installation Verification and Bleeding
Turn your boiler back on and set it to heating mode. As the system warms up, pressure will rise due to thermal expansion. Your system should stabilise between 1.5 and 2.0 bar when hot. If you have recently installed a Kingspan Albion direct Combi Fortic tank, check its associated pipework for air pockets as well.
Bleed all radiators in sequence, starting with the ground floor. This process releases air introduced during filling. Air pockets prevent proper circulation and reduce system efficiency. Check your pressure gauge again after bleeding, as you will likely need to top up slightly. If you find yourself adjusting settings frequently, an RF wireless combi pack 4 can help you monitor system behaviour more accurately.
Maintenance and Long-Term System Management
Check your system pressure monthly during the heating season. Normal operation sees pressure drop by 0.1 bar over several months. Faster pressure loss indicates a leak that needs investigation. Radiator valve glands and pump seals are common culprits. Inspect your filling loop connections annually to ensure they remain watertight.
Never use your filling loop to continuously top up a system that is losing pressure rapidly. If you are refilling weekly, you have a leak that needs proper repair. Continuous filling introduces fresh oxygenated water which causes internal corrosion. If you have any doubts about your system's integrity, contact our technical team for expert advice.
Conclusion
Filling loop installation transforms system pressure maintenance from an expensive callout into a straightforward task. With the right technique and attention to regulatory requirements, you will install a system that serves reliably for years. The key lies in methodical preparation and correct compression fitting technique. Take your time, verify your connections, and always prioritise component quality. Your boiler will thank you with lower running costs and improved reliability.