
Fixing a Dripping Tap: Tools and Steps
Dripping taps waste thousands of litres of water annually, whilst creating irritating noise and potential damage. Understanding dripping tap repair techniques enables homeowners to resolve these common plumbing issues quickly and economically. This tap repair guide covers essential tools, diagnostic approaches, and detailed repair procedures for various tap types.
Understanding Why Taps Drip
Identifying the cause of leaks determines appropriate repair strategies and replacement parts required. Different tap designs experience distinct failure modes requiring specific solutions.
Common Causes
Worn washers represent the most frequent culprit behind traditional tap drips. These rubber or fibre discs create watertight seals when taps close. Repeated compression gradually degrades the washer material, allowing water to seep past the sealing surfaces. Kitchen taps experience accelerated wear due to frequent daily operation compared to bathroom fixtures used less intensively.
Damaged O-rings cause leaks around tap bodies and spindles. These circular rubber seals prevent water from escaping through moving components. Perished O-rings lose elasticity through age and chemical exposure, failing to maintain effective seals. Replacing O-rings during washer changes prevents future problems whilst taps remain disassembled.
Corroded valve seats create uneven sealing surfaces, preventing washers from forming watertight barriers. Hard water deposits and general corrosion gradually pit brass valve seat surfaces. Even new washers cannot seal effectively against damaged seats, causing persistent drips despite component replacement. Valve seat refinishing or tap replacement becomes necessary when corrosion proves severe.
Loose components within tap assemblies permit water leakage through joints and connections. Regular use gradually loosens securing nuts and compression fittings. Tightening accessible components sometimes resolves drips without requiring complete disassembly. However, excessive tightening damages threads and seals, worsening problems rather than solving them.
Types of Taps
Traditional pillar taps feature separate hot and cold controls mounted independently above sinks or basins. These simple designs use washer-based valve mechanisms offering straightforward repairs. Quarter-turn ceramic disc variants replaced traditional taps in many modern installations, though older washer-type pillar taps remain common in period properties.
Mixer taps combine hot and cold supplies through single spouts. Kitchen mixer taps typically feature swivel spouts and single-lever operation. Basin mixers may use dual handles or single-lever controls depending on design preferences. Internal mechanisms vary significantly between manufacturers, affecting repair complexity and parts availability.
Ceramic disc taps employ precision-ground ceramic plates, creating watertight seals through rotational alignment. These designs offer long-lasting performance with smooth operation requiring minimal maintenance. When ceramic disc cartridges eventually fail, complete cartridge replacement typically proves necessary rather than individual component repairs. Heating and Plumbing World supplies replacement parts for various tap types and brands.
Monobloc taps unite the spout and controls in a single body unit. These contemporary designs dominate modern bathroom installations through sleek aesthetics and space-efficient footprints. Repair access varies considerably between monobloc models - some feature straightforward cartridge replacement, whilst others require extensive disassembly.
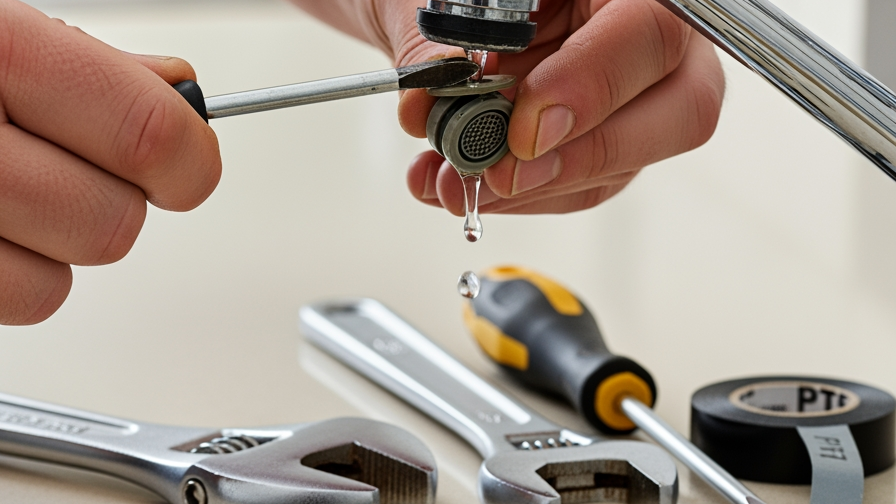
Essential Tools and Materials
Assembling appropriate tools and replacement parts before commencing repairs prevents frustrating mid-project interruptions. Most dripping tap repair projects require common household tools supplemented by specific plumbing components.
Basic Tool Kit
Adjustable spanners represent essential tools for tap repairs. Two spanners often prove necessary - one holding tap bodies whilst another loosens securing nuts. Quality adjustable spanners grip fasteners firmly without rounding edges. Sizes between 200mm and 300mm suit most domestic tap applications.
Screwdrivers in various sizes and types access different tap handle fixings. Flat-blade screwdrivers suit traditional slotted screws, whilst Phillips or Pozidrive patterns feature in modern taps. Precision screwdriver sets enable the removal of small grub screws securing contemporary tap handles. Magnetic-tip screwdrivers prevent the loss of tiny fasteners during disassembly.
Allen keys (hex keys) secure many modern tap handles through grub screws positioned discreetly in handle bases or sides. Complete Allen key sets ensure appropriate sizes remain available. Some tap manufacturers use imperial measurements, whilst others specify metric dimensions - comprehensive sets prevent compatibility issues.
Pliers assist with stubborn components and precise O-ring installation. Smooth-jaw pliers avoid damaging chrome-plated surfaces. Long-nose pliers reach into confined spaces whilst providing control and manipulation of small components. Slip-joint pliers adjust for various component sizes encountered during repairs.
Replacement Parts
Tap washers come in numerous sizes and materials suited to different applications. Standard sizes include 12mm, 15mm, and 19mm diameters, though less common dimensions exist. Rubber washers suit cold water applications, whilst fibre or leather variants withstand hot water better. Purchasing assorted washer packs ensures the correct sizes remain readily available.
O-rings seal moving tap components and prevent leaks around spindles. These come in various diameters and cross-sectional thicknesses. Measuring existing O-rings or referring to manufacturer specifications ensures correct replacement selection. Assorted O-ring kits provide comprehensive size ranges for diverse repair requirements.
Ceramic disc cartridges require model-specific replacements matching original tap designs. Manufacturers produce cartridges in different configurations - removing existing cartridges enables accurate replacement identification. Some suppliers offer universal cartridges fitting multiple tap models, though genuine manufacturer parts typically ensure the best compatibility.
PTFE tape (plumber's tape) seals threaded connections, preventing water leakage. Wrapping tape around male threads before assembly creates reliable seals. Standard white PTFE tape suits most cold water applications, whilst gas-rated yellow tape provides enhanced sealing for demanding installations. Applying correct tension whilst wrapping prevents tape tearing or excessive buildup.
Additional Supplies
Cloths and towels protect work surfaces and catch water during disassembly. Old towels spread around taps prevent dropped components from disappearing into waste pipes. Absorbent materials mop residual water from pipework and fittings, maintaining dry working conditions. Clean cloths polish chrome surfaces after reassembly.
Buckets or bowls positioned beneath work areas collect water released when disconnecting components. Even after isolating supplies, considerable water remains within taps and connecting pipework. Containers prevent flooding and facilitate neat working environments. Empty buckets before they overflow during extended repairs.
Penetrating oil loosens corroded or seized components. Applying oil to stuck threads and allowing penetration time greatly eases disassembly. Avoid excessive oil near washers and seals as petroleum products degrade rubber components. Wiping excess oil prevents a mess and maintains secure grips on tools and fittings.
Silicone grease lubricates moving tap components during reassembly. Applying thin coatings to O-rings and ceramic discs ensures smooth operation whilst protecting sealing surfaces. Food-grade silicone grease suits drinking water applications. Avoid petroleum-based greases that attack rubber components.
Preparation Before Starting
Proper preparation prevents common mistakes and ensures efficient dripping tap repair completion. Taking time for careful setup pays dividends through smoother progress and better results.
Safety First
Turning off water supplies prevents flooding during tap disassembly. Most properties feature isolation valves beneath sinks and basins, controlling individual tap supplies. Quarter-turn valves close with a 90-degree rotation from fully open positions. Traditional gate valves require multiple anticlockwise rotations until fully closed. Testing taps after closing valves confirms successful water isolation.
Main stopcock closure becomes necessary when individual isolation valves prove absent or malfunctioning. Stopcocks typically locate under kitchen sinks, in cupboards beneath stairs, or where mains supplies enter properties. Operating stopcocks requires clockwise rotation until resistance indicates complete closure. Main stopcock closure affects entire properties - warning household occupants prevents inconvenience.
Draining residual water from taps prevents spills during component removal. Opening taps after supply isolation releases pressure and expels water trapped within mechanisms. Allowing several minutes ensures complete drainage. Some water inevitably remains within tap bodies - positioning cloths or containers catches this residual water during disassembly.
Protecting Your Work Area
Covering sinks and basins with thick cloths or towels prevents damage from dropped tools or components. Ceramic sinks chip easily when struck by metal spanners or heavy tap parts. Protective layers cushion impacts whilst creating visible backgrounds, preventing small components from disappearing into white sinks. Taping cloth edges prevents movement during repair work.
Preventing dropped parts from entering waste pipes saves considerable frustration. Plugging sink outlets or covering with cloths catches washers, screws, and O-rings knocked from working surfaces. Lost components in waste pipes necessitate trap removal or replacement part procurement, extending simple repairs unnecessarily. Magnetic trays collect ferrous fasteners in convenient locations.
Organising tools and components systematically throughout repairs maintains efficiency and prevents confusion. Arranging removed parts in disassembly order facilitates the correct reassembly sequence. Photographing tap configurations before disassembly provides a reference during reconstruction. Clear workspace organisation reduces stress and accelerates completion times.
Step-by-Step Repair Process for Pillar Taps
Traditional pillar taps follow standard designs, enabling straightforward repairs. Understanding this tap repair guide sequence ensures successful outcomes even for inexperienced DIY enthusiasts.
Removing Tap Handles
Identifying handle attachment methods determines removal approaches. Traditional cross-head handles feature central cover caps hiding securing screws. Prising caps gently with flat screwdrivers exposes screw heads. Modern handles often use concealed grub screws accessed from the handle sides or bases. Small Allen keys remove these discrete fasteners.
Removing cover caps requires care to prevent chrome damage. Thin-bladed screwdrivers inserted beneath cap edges lift covers without scratching visible surfaces. Some caps thread into tap bodies rather than pressing in - attempting to prise threaded caps damages surrounding finishes. Anticlockwise rotation removes threaded variants smoothly.
Unscrewing grub screws releases handles from tap spindles. Allen keys or screwdrivers engage screw heads whilst avoiding excessive force that strips threads. Corrosion sometimes seizes grub screws, requiring penetrating oil application and patience. After releasing fixings, handles lift vertically from the spindle flats or splines.
Accessing Internal Components
Removing headgear assemblies exposes washers and valve components. Adjustable spanners grip hexagonal headgear nuts immediately below handle positions. Anticlockwise rotation loosens headgear, whilst the second spanners prevent the tap bodies from rotating. Moderate force suffices for correctly maintained taps - excessive force indicates corrosion requiring penetrating oil treatment.
Extracting valve components reveals wear patterns and damage. Jumper assemblies containing washers withdraw with headgear on some designs. Other taps feature washer plates remaining within valve bodies after headgear removal. Inspection identifies worn washers, damaged O-rings, and corroded valve seats requiring attention.
Inspecting for damage determines the repair scope. Badly pitted valve seats prevent even new washers from sealing effectively. Minor corrosion responds to valve seat refinishing tools that resurface brass seating areas. Severe damage necessitates complete tap replacement or professional revalving services. Cracked jumper assemblies require replacement rather than simple washer changes.
Replacing Washers and Seals
Removing old washers from jumper assemblies or washer plates enables replacement. Small screws or press-fit retention secure washers to jumpers. Undoing securing screws or prising worn washers free with small screwdrivers releases components. Inspecting washer recesses identifies debris or corrosion requiring cleaning before installing replacements.
Selecting the correct replacement washer sizes ensures proper sealing. Measuring old washers or jumper assemblies determines the required dimensions. Standard sizes suit most domestic taps, though unusual dimensions occasionally occur. Matching washer material to tap temperature - rubber for cold, fibre for hot - optimises performance and longevity.
Installing new washers involves securing them firmly to jumper assemblies or positioning them within valve bodies. Press-fit washers require gentle tapping, ensuring complete seating without damage. Screwed washers tighten firmly without excessive torque that splits the washer material. Confirming secure washer attachment prevents components from falling into valve bodies during reassembly. Pressure relief valves and quality tap components ensure reliable plumbing system operation.
Reassembly and Testing
Securing all components in reverse disassembly order completes repairs. Applying light silicone grease to O-rings and threads eases assembly whilst improving seal quality. Threading headgear into tap bodies requires care in aligning threads correctly. Cross-threading damages components requiring expensive replacements. Hand-tightening initially confirms proper thread engagement before applying spanners.
Restoring water supply gradually tests repairs under controlled conditions. Slowly opening isolation valves or main stopcocks allows system pressure rebuilding whilst monitoring for leaks. Full valve opening restores normal operation after confirming leak-free reassembly. Operating repaired taps through several cycles confirms smooth function and adequate flow rates.
Checking for leaks immediately after restoration and again after several hours ensures successful repairs. Minor weeping sometimes occurs initially before washers bed into valve seats. Persistent dripping indicates inadequate washer seating, incorrect washer sizes, or damaged valve seats requiring additional attention. Successful repairs eliminate drips whilst restoring full tap functionality.
Fixing Ceramic Disc Taps
Ceramic disc tap mechanisms differ substantially from traditional washer designs. Understanding these differences enables appropriate repair approaches and prevents damage through incorrect techniques.
Differences from Traditional Taps
Cartridge-based systems replace traditional washer and jumper assemblies. Precision-manufactured ceramic discs slide across each other, opening and closing water pathways. These cartridges contain all moving components within sealed units. When cartridges fail, complete replacement proves necessary rather than individual component servicing.
Single or dual-handle ceramic disc taps operate through different mechanical arrangements. Single-lever taps control both temperature and flow through combined cartridge movements. Dual-handle designs feature separate cartridges for hot and cold supplies. Identifying configuration types ensures correct replacement cartridge selection.
Identifying correct cartridge types requires careful observation of existing components. Manufacturers produce numerous cartridge variants with subtle dimensional differences. Removing existing cartridges enables precise matching at suppliers. Some retailers offer cartridge identification services using photographs or physical samples.
Cartridge Replacement Process
Removing tap bodies exposes ceramic disc cartridges. Handle removal follows procedures similar to traditional taps - locating and removing grub screws or cover caps. After handle removal, decorative shrouds or body sections unscrew, revealing cartridge housings. Some monobloc designs require complete tap removal from mounting surfaces for cartridge access.
Extracting ceramic disc cartridges typically involves unscrewing securing nuts or clips. Cartridges lift vertically from valve housings after releasing retention mechanisms. Inspecting removed cartridges identifies manufacturer markings and model numbers, facilitating accurate replacement procurement. Noting cartridge orientation during removal ensures correct replacement installation.
Installing replacement cartridges requires precise alignment, matching the original orientations. Incorrect installation prevents proper tap operation or causes immediate failures. Following the manufacturer's instructions regarding cartridge positioning ensures successful repairs. Securing cartridges firmly without excessive force prevents housing damage whilst ensuring stable operation.
Repairing Mixer Taps
Mixer taps combine hot and cold water supplies, introducing additional complexity compared to simple pillar taps. Different failure modes require varied repair approaches depending on leak locations and tap configurations.
Kitchen Mixer Tap Issues
Spout leaks develop at swivel joints connecting spouts to tap bodies. O-rings sealing rotating connections gradually wear through repeated movement. Accessing these seals sometimes requires complete tap removal from mounting surfaces. Replacement O-rings matching original dimensions restore leak-free operation after careful installation.
Base leaks indicate deteriorated seals between tap bodies and mounting surfaces. Flexible hoses connecting taps to water supplies sometimes leak at compression fittings. Tightening compression nuts resolves minor weeps, whilst persistent leaks require olive or hose replacement. Removing taps from sinks enables thorough seal inspection and replacement.
Handle problems in kitchen mixers related to cartridge failures or loose securing mechanisms. Single-lever controls use complex cartridges that manage both temperature and flow simultaneously. These specialised cartridges prove more expensive than simple pillar tap components but restore full functionality upon replacement. Dual-handle kitchen mixers feature separate cartridges for each control.
Basin Mixer Repairs
Single-lever mechanisms dominate modern basin mixer installations. These compact cartridges enable precise temperature and flow control through intuitive handle movements. Cartridge wear manifests as reduced control precision or persistent dripping. Complete cartridge replacement proves the standard repair approach for failed single-lever mechanisms.
Dual-handle configurations use separate controls for hot and cold supplies. These designs employ individual cartridges or traditional washer assemblies, depending on tap quality and age. Higher-end dual-handle mixers feature ceramic disc cartridges, whilst economy models may use standard washer valves. Identifying component types determines appropriate repair procedures and replacement parts.
Common failure points in basin mixers include spout O-rings, cartridge seals, and base gaskets. Methodical inspection identifies specific leak sources, guiding repair efforts. Sometimes multiple seal failures occur simultaneously in older taps - comprehensive seal replacement during repairs prevents recurring problems shortly after initial fixes.
Troubleshooting Persistent Problems
Some dripping tap repair attempts fail to resolve leaks despite following standard procedures. These situations require additional diagnostic work and potentially more extensive interventions.
When Simple Repairs Don't Work
Valve seat damage prevents effective sealing, even with new washers correctly installed. Inspecting valve seats with torches and mirrors reveals pitting or scoring that compromises sealing surfaces. Valve seat refinishing tools - rotating cutters specifically designed for this application - resurface damaged brass. This specialised equipment remains a worthwhile investment for enthusiasts tackling multiple tap repairs.
Thread corrosion complicates reassembly or prevents components from tightening adequately. Severely corroded threads sometimes strip during disassembly or reassembly attempts. Thread repair techniques, including taps, dies, or helical inserts, restore damaged threads. However, extensive corrosion may indicate taps approaching end-of-life, requiring complete replacement rather than continued repairs.
Complete tap replacement considerations arise when repair costs approach new tap prices or damage proves irreparable. Modern replacement taps offer improved efficiency, contemporary styling, and warranty protection. Straightforward replacement procedures enable DIY installation, though professional fitting ensures optimal results, particularly for complex mixer installations.
Dealing with Seized Components
Applying penetrating oil to corroded threads loosens stuck components after allowing adequate penetration time. Spraying or brushing oil onto exposed threads, then waiting several hours or overnight, maximises effectiveness. Repeated applications increase penetration into tight corrosion. Gentle tapping with wooden blocks transmits vibration, helping oil reach deep into threads.
Using heat carefully expands metal components, sometimes breaking corrosion bonds. Hair dryers provide controlled heat application suitable for domestic tap repairs. Excessive heat damages seals, melts plastic components, and risks burns - professional blowtorch use requires appropriate experience and safety precautions. Heat application generally represents the last resort approach before abandoning repair attempts.
When to call professionals becomes relevant after exhausting DIY approaches or recognising situations exceeding personal capabilities. Severely seized taps risk additional damage during forceful removal attempts. Professional plumbers possess specialised tools and extensive experience in managing difficult repairs efficiently. Comparing professional quotations against new tap costs and installation complexity informs sensible decisions.
Preventative Maintenance
Regular tap maintenance extends component life whilst reducing failure frequency. Simple preventative measures prove far easier than reactive repairs to failed taps.
Regular Tap Care
Cleaning aerators removes accumulated debris that restricts flow and causes uneven spray patterns. Unscrewing aerators from spout tips exposes mesh screens trapping sediment and limescale deposits. Soaking aerators in a vinegar solution dissolves mineral buildup, whilst brushing removes stubborn deposits. Reinstalling cleaned aerators restores proper flow characteristics.
Checking for early wear enables preemptive component replacement before failures cause water damage. Gradually stiffening tap operation indicates developing problems requiring attention. Slight weeping around tap bodies suggests deteriorating seals. Addressing issues at the first signs prevents more extensive damage and simplifies repairs through easier disassembly.
Proper operation techniques reduce component wear significantly. Closing taps firmly but gently prevents excessive washer compression that accelerates deterioration. Avoiding extreme force when operating stiff taps prevents internal damage. Teaching household members appropriate tap operation extends component life across entire properties.
Water Quality Considerations
Hard water effects accelerate tap component wear through limescale accumulation. Mineral deposits coat moving parts, increasing friction and restricting movement. Valve seats covered with scale prevent effective washer sealing. Properties in hard water areas benefit from water softeners, reducing mineral content and extending tap longevity.
Scale buildup prevention includes regular cleaning with descaling solutions appropriate for plumbing fixtures. Vinegar-soaked cloths wrapped around tap bodies dissolve visible scale deposits. Internal descaling requires disassembly and soaking components in stronger descaling agents. Preventative descaling proves less labour-intensive than addressing advanced scale damage.
Filter systems protect plumbing fixtures from sediment and debris in water supplies. Whole-house filters installed at mains entry points capture particles before reaching taps. Point-of-use filters beneath sinks provide additional protection for specific fixtures. Regular filter maintenance ensures continued effectiveness in protecting tap mechanisms.
Common Mistakes to Avoid
Understanding frequent errors in dripping tap repair prevents problems that compromise results or create additional damage. Learning from common mistakes saves time, money, and frustration.
Installation Errors
Over-tightening components damages threads and crushes seals, causing immediate or premature failures. Adequate tightness ensures secure assembly without requiring excessive force. Hand-tightening followed by moderate spanner tightening suffices for most applications. Perceiving resistance increase indicates approaching adequate torque - continuing beyond this point risks damage.
Incorrect washer sizes compromise sealing effectiveness. Undersized washers fail to cover the valve seat areas completely, whilst oversized variants bunch up, preventing proper seating. Measuring carefully or carrying old washers to suppliers ensures accurate size matching. Some taps use non-standard washer dimensions requiring manufacturer-specific replacements.
Missing seals or O-rings during reassembly cause immediate leaks upon water restoration. Carefully accounting for all removed components during disassembly prevents overlooking small seals during reconstruction. Inspecting valve housings before reassembly confirms all sealing surfaces receive appropriate gaskets or O-rings. Photographing assemblies during disassembly provides reassembly reference.
Preparation Oversights
Failing to turn off the water properly results in flooding during tap disassembly. Confirming successful isolation through tap operation prevents unpleasant surprises. Some isolation valves malfunction through infrequent use - testing effectiveness before commencing major disassembly prevents disasters.
Not having replacement parts ready extends simple repairs into multi-day projects. Identifying required components before starting enables single-trip parts procurement. Removing taps to identify parts at suppliers causes inconvenience but ensures correct selection. Purchasing common washer and O-ring assortments maintains readiness for future repairs.
Inadequate workspace protection leads to damaged sinks, lost components, and unnecessary mess. Investing minutes in thorough preparation prevents hours addressing preventable problems. Experienced professionals emphasise the importance of preparation - taking time for proper setup demonstrates wisdom rather than impatience.
When to Call a Professional
Certain situations justify professional plumber engagement rather than DIY repair attempts. Recognising these circumstances prevents wasted effort and potential property damage.
Complex Repairs
Concealed pipework issues require specialist knowledge and equipment for diagnosis and repair. Leaks within walls or beneath floors demand professional investigation, preventing exploratory demolition exceeding repair costs. Plumbers utilise moisture meters, thermal cameras, and acoustic leak detection to locate problems accurately before commencing invasive work.
Multiple tap failures throughout properties sometimes indicate systemic issues rather than individual component wear. Water pressure problems, contaminated supplies, or defective materials affect all fixtures simultaneously. Professional assessment identifies root causes, enabling effective solutions rather than repeated symptomatic repairs. Boiler spares and heating system components may also require professional attention for complex issues.
Pressure problems manifest as poor flow rates, inconsistent temperatures, or unusual noises. These symptoms suggest pump failures, blockages, or system design inadequacies. Professional plumbers diagnose pressure issues systematically, implementing appropriate remedial measures to restore normal operation.
Safety Concerns
Water supply complications, including contamination, cross-connection risks, or backflow hazards, require professional evaluation. Incorrectly installed or maintained plumbing potentially introduces contaminants into drinking water supplies. Professional plumbers understand water regulations, ensuring safe, compliant installations, protecting household health.
Structural damage around taps or pipework suggests significant problems exceeding cosmetic concerns. Rotted floor timbers, damaged wall structures, or ceiling staining indicate sustained water leakage requiring prompt professional attention. Addressing underlying damage whilst performing plumbing repairs prevents progressive deterioration, threatening building integrity.
Warranty considerations influence repair decisions for recently installed taps or plumbing systems. DIY repairs sometimes void manufacturer warranties, leaving homeowners unprotected against defects. Professional installation and maintenance preserves warranty coverage whilst ensuring quality workmanship. Reviewing warranty terms before commencing repairs prevents inadvertently surrendering valuable protections.
Conclusion
Most dripping tap repair projects prove manageable for DIY enthusiasts equipped with appropriate tools and following systematic approaches. Understanding tap mechanisms, identifying failure causes, and executing careful repairs enables successful outcomes, saving professional call-out costs. This tap repair guide provides comprehensive information supporting confident, effective household plumbing maintenance.
Proper preparation, accurate component identification, and methodical work prevent common mistakes whilst ensuring lasting results. Investing time in thorough diagnostics before purchasing parts prevents incorrect replacements and repeated efforts. Regular maintenance extends tap life significantly, reducing repair frequency and preserving fixture performance.
For complex repairs, persistent problems, or situations requiring specialist expertise, contact us to discuss professional plumbing services, ensuring safe, reliable solutions for all household plumbing requirements.