
Flaring Tools for Copper Pipe Connections
Copper pipe connections hold together the backbone of British heating and plumbing systems, from boiler installations to radiator circuits. Walk into any professional plumber's van, and you'll find copper flaring tools tucked alongside pipe cutters and wrenches. These aren't fancy gadgets that make work easier; they're fundamental pieces of kit that create leak-proof connections without soldering.
A flared connection works by expanding the end of a copper pipe into a cone shape that seals against a matching fitting. When you tighten the connection, the flared edge compresses between the fitting and a nut, creating a mechanical seal that handles pressure without heat or flux. This method proves particularly valuable in tight spaces, on live systems where you can't use a torch, or when working with refrigeration lines that demand perfect seals.
The technique dates back decades, yet many installers still struggle with inconsistent results. Some flares crack under pressure. Others leak from the first fill. The difference usually comes down to tool quality and technique, not luck.
What Makes a Flaring Tool Work
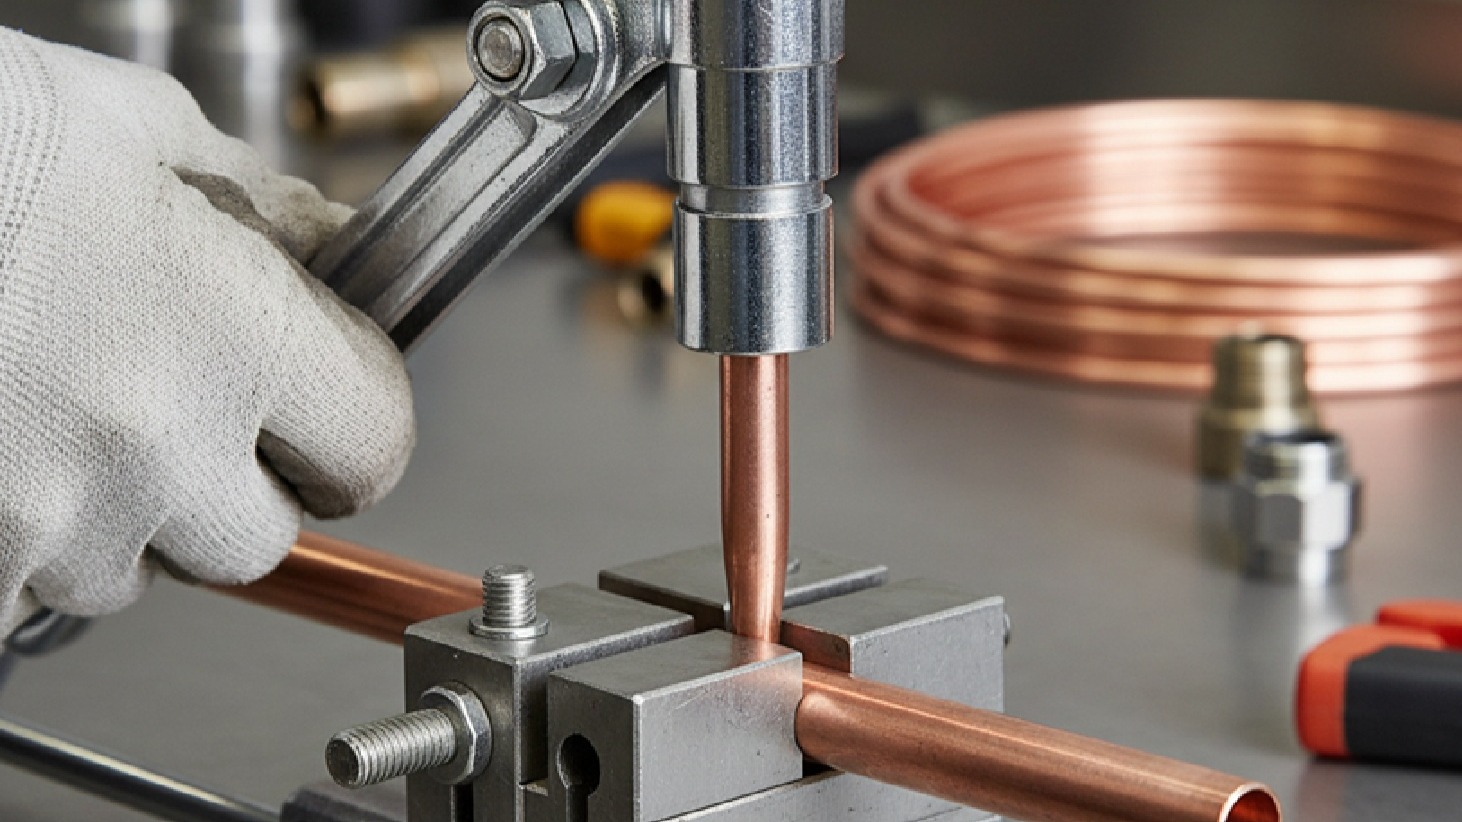
At its core, a copper flaring tool consists of two main components: a clamp block that holds the pipe steady and a forming cone that shapes the copper. The clamp block features holes sized for different pipe diameters, typically ranging from 3/16 inch to 3/4 inch. You insert the pipe through the correct hole, adjust it to the proper height, then tighten the clamp.
The forming cone threads into a yoke that positions it directly above the pipe opening. As you turn the handle, the cone descends into the pipe end, forcing the copper to expand outward at a precise 45-degree angle. This angle isn't arbitrary, it matches the standard flare fitting design used across heating and plumbing systems.
Quality tools machine the cone from hardened steel and polish it to a mirror finish. Any imperfection in the cone transfers directly to the flare, creating weak spots that leak. Budget tools often use softer metals that wear quickly, producing progressively worse flares after a few dozen uses.
The clamp block matters just as much. If it doesn't hold the pipe perfectly square and stable, the cone enters at an angle, creating an uneven flare. Professional-grade blocks use thick steel or aluminium with precision-drilled holes. They also feature a flat base that sits stable on uneven surfaces, which matters when you're working in a cramped airing cupboard or under a boiler.
Types of Flaring Tools You'll Encounter
Single-flare tools create the basic 45-degree cone we've discussed. These handle most heating applications where you're connecting copper pipe to compression fittings or flare fittings rated for water and heating systems. A decent single flare tool costs between £30 and £80, depending on build quality and pipe size range.
Double-flare tools add an extra step to the process. After creating the initial flare, you insert a different adapter and fold the flared edge back on itself, creating a thicker, more durable connection. Double flares handle higher pressures and resist cracking better than single flares. Refrigeration work typically requires double flares because of the pressures involved and the need for absolutely leak-free connections. These tools cost £60 to £150 for professional models.
Eccentric flaring tools represent the premium option. Instead of forcing a cone straight down into the pipe, these tools use a rotating cone that gradually shapes the copper with less force. This produces smoother, more consistent flares with fewer stress points. The technique works particularly well with thin-walled copper or when you need perfect results on critical connections. Expect to pay £100 to £300 for a quality eccentric tool.
Hydraulic flaring tools take the physical effort out of the equation. You position the pipe, pump the handle a few times, and hydraulic pressure does the forming work. These prove invaluable when you're making dozens of flares on a large installation or working with larger diameter pipes that require significant force. Professional plumbers and HVAC technicians often carry these for efficiency. Prices start around £200 and climb past £500 for industrial-grade kits.
Selecting the Right Tool for Your Work
Your choice depends on what you're actually connecting. For standard heating system work, connecting radiator valves, cylinder coils, or zone valves, a quality single flare tool handles 90% of situations. If you're working with Grundfos pumps or installing Gledhill cylinders, you'll appreciate the reliability of a well-made basic tool.
Refrigeration work, air conditioning installations, or any application involving refrigerant lines demands double flare capability. The regulations around refrigerant systems require leak-free connections, and double flares provide the extra security needed for these applications.
Pipe diameter matters significantly. A tool rated for 1/4 inch to 5/8 inch covers most domestic heating work. If you regularly work on commercial systems with larger pipes, you'll need a tool with extended capacity. Check the specifications carefully; some tools list imperial sizes, others metric, and you need to match your actual pipe stock.
Build quality separates tools that last decades from those that fail within months. Look for hardened steel cones, precision-machined clamp blocks, and solid construction throughout. The yoke should thread smoothly without play or wobble. Clamp screws should bite firmly without stripping. If you're buying in person, handle the tool and check for these details. Online purchases should come from reputable suppliers with clear specifications.
Creating Proper Flares: The Technique That Matters
Start with a clean, square cut. Use a proper pipe cutter, not a hacksaw, and deburr both the inside and outside edges thoroughly. Any roughness or unevenness at the pipe end transfers into the flare, creating leak paths. A small round file or deburring tool takes seconds to use and prevents hours of callbacks.
Insert the pipe into the clamp block so it protrudes exactly the right amount. Too little projection and you won't get a full flare. Too much and the copper folds over instead of flaring smoothly. Most tools include a guide, but a general rule puts the pipe end roughly level with the clamp block surface or slightly above, about the thickness of a pound coin for smaller pipes.
Tighten the clamp firmly. The pipe shouldn't move at all when you apply the forming cone. If it shifts during flaring, you'll get an uneven, weak connection.
Apply a tiny amount of lubricant to the forming cone. A drop of light machine oil or even a touch of washing-up liquid helps the cone slide smoothly against the copper, reducing friction and preventing galling. Don't overdo it, you want lubrication, not a puddle.
Thread the forming cone down slowly and steadily. Rushing creates uneven pressure and can crack the copper. You should feel smooth, consistent resistance. If you encounter sudden hard spots or grinding sensations, stop and check for debris or damage.
Once the cone bottoms out, give it one final snug turn, then back it off. Remove the pipe and inspect the flare. It should show a smooth, even cone with no cracks, tears, or thin spots. The flare surface should look polished, not rough or scored.
Test fit the connection before committing. The flare nut should thread on easily by hand, and the flare should seat fully against the fitting. If you need to force anything, something's wrong; either the flare angle is off, there's debris in the fitting, or the pipe size doesn't match properly.
Common Problems and How to Avoid Them
Cracked flares usually result from work-hardened copper or excessive forming pressure. Copper hardens when you bend or work it, becoming brittle. If you're flaring near a bend or a section of pipe that's been handled roughly, anneal the end first by heating it to dull red with a torch and letting it cool naturally. This softens the copper and prevents cracking.
Uneven flares come from misalignment. Check that your clamp block sits level, the pipe is square in the hole, and the forming cone descends straight down. Even a slight angle creates a lopsided flare that won't seal properly.
Rough flare surfaces indicate either a damaged cone or insufficient lubrication. Inspect the cone for scratches or dings. If it's clean, try using slightly more lubricant on your next attempt.
Torn flares happen when the pipe isn't properly deburred or when debris enters the joint during forming. Always clean both inside and outside pipe edges before flaring.
Oversized flares result from too much pipe projection or using the wrong hole in the clamp block. Double-check your setup before forming.
When Flaring Makes Most Sense
Following a pipe flaring tool guide helps you understand when flared connections offer advantages over soldering. Tight spaces where you can't safely use a torch benefit from flaring. Working under floorboards, inside walls, or near combustible materials makes soldering risky or impossible. Flared connections eliminate fire hazards entirely.
Live systems where you can't fully drain the pipes also favour flaring. Even a trickle of water prevents proper soldering, but flared connections don't care about residual moisture. This proves particularly useful when adding zones to existing heating systems or connecting to active cylinder coils.
Temporary or test installations benefit from flared connections because you can easily disconnect and reuse components. Soldered joints require cutting and resoldering, but flared connections simply unthread. This matters when commissioning systems or troubleshooting flow issues.
Refrigeration and air conditioning work mandates flaring in most cases. The refrigerants involved attack soldered joints over time, and the pressure cycling demands the flexibility that mechanical connections provide. Regulations around these systems specifically require flared or brazed connections, not standard soldering.
However, flaring has limitations. Connections cost more than soldered joints because you need special fittings. The joints are bulkier, which matters in tight spaces. And whilst properly made flared connections are extremely reliable, they do require more skill and attention than many installers realise.
Maintaining Your Flaring Tools
Clean the forming cone after every use. Copper particles and lubricant residue build up quickly, and even a thin film affects flare quality. Wipe the cone with a clean cloth, then inspect it under good light for any damage.
Store tools in a dry location. The clamp blocks, particularly cast iron models, will rust if left damp. A light coat of oil on metal surfaces prevents corrosion during storage.
Check clamp screws regularly for wear. These take significant force during use, and threads can strip or deform over time. Replace worn screws before they fail completely and damage the clamp block.
Lubricate moving parts occasionally. The yoke threads, in particular, benefit from a drop of light oil to maintain smooth operation. Don't use heavy grease that can attract dirt and grit.
Replace damaged cones immediately. A scratched or dinged cone produces flawed flares, and there's no reliable way to repair cone damage. Most manufacturers sell replacement cones separately, which costs far less than replacing the entire tool.
Building Your Flaring Kit
A complete setup includes more than just the flaring tool itself. You'll need a quality pipe cutter that produces clean, square cuts without deforming the pipe. A proper deburring tool removes sharp edges quickly and thoroughly. Keep a small file handy for stubborn burrs or slight adjustments.
Stock appropriate flare fittings in common sizes. These differ from standard compression fittings, so verify you're ordering the correct type. Having fittings on hand prevents delays when you discover a connection needs replacing.
Carry light machine oil or purpose-made flaring lubricant. A small bottle lasts months and prevents galling and rough flares.
Include a small mirror or inspection light in your kit. Checking flare quality in dim spaces or awkward angles becomes much easier with proper lighting and viewing tools.
Consider a flare gauge if you're doing precision work. This simple tool verifies that your flare angle and diameter meet specifications, which matters for critical installations or when working to specific standards.
Professional Applications and Considerations
Commercial heating installations often involve larger diameter copper pipes that require substantial force to flare properly. A hydraulic tool becomes essential rather than optional when you're regularly working with 22mm or 28mm pipe. The consistency and reduced physical effort justify the investment quickly.
Working with different copper grades affects flaring results. R250 (half-hard) copper is standard for most heating applications and flares reliably with proper technique. R220 (annealed/soft) copper flares more easily but can be too soft for some applications. R290 (hard) copper requires annealing before flaring to prevent cracking.
When connecting to Andrews boilers or other heating equipment, verify the connection requirements before choosing between flared and compression fittings. Some manufacturers specify particular connection types in their installation instructions, and using the wrong method can void warranties.
System pressure ratings matter significantly. Standard single flares handle typical domestic heating pressures (1 to 3 bar) without issues. Higher pressure systems, including those with Altecnic expansion vessels, may require double flares or brazed connections depending on specific pressure ratings and application.
Integrating Flared Connections in Modern Systems
Contemporary heating systems increasingly use mixed materials, copper pipe connecting to Polypipe plastic systems, for example. Flared connections provide reliable transition points where different materials meet, particularly when combined with appropriate adapter fittings.
Smart heating controls from manufacturers like EPH Controls or Honeywell often include zone valves and actuators that benefit from easily serviceable connections. Flared joints at these points simplify future maintenance and control upgrades without disturbing surrounding pipework.
Underfloor heating manifolds and distribution systems frequently use flared connections because of the number of joints involved and the need for precise flow balancing. The ability to disconnect and adjust connections during commissioning proves valuable in these applications. Systems incorporating Kingspan cylinders or Myson radiators benefit from properly executed flared connections at key junction points.
Creating Reliable Connections
Copper flaring tools transform copper pipe from straight tubes into sealed, pressure-tight connections without heat or flux. The technique requires attention to detail, clean cuts, proper pipe projection, steady forming pressure, and quality tools. Done correctly, flared joints last decades and handle the demands of modern heating systems reliably.
The investment in a quality pipe flaring tool guide and equipment pays back quickly through reduced callbacks, faster installations in challenging situations, and the flexibility to work on systems where soldering isn't practical. Whether you're connecting radiator valves, installing cylinder coils, or running refrigerant lines, proper flaring technique creates connections you can trust.
Start with a solid single-flare tool if you're building your kit. Learn the fundamentals of scrap pipe until your flares come out consistent and clean. Pay attention to pipe preparation, it matters more than most installers realise. And remember that the goal isn't just a flare that looks good, but a connection that seals perfectly and lasts the life of the system.
The best flared joint is the one you never think about again after installation. That reliability comes from combining quality tools with proper technique, and it's a skill that serves you throughout your career in heating and plumbing work. For professional-grade copper flaring tools and quality plumbing fittings, Heating and Plumbing World supplies trade professionals across the UK. Technical guidance on pipe flaring tool selection and techniques is available. Get in touch for expert support.