
Halstead Eden CBX: Diverter Valve Cartridge Replacement Guide
The diverter valve cartridge in your Halstead Eden CBX controls the direction of heated water. It determines whether energy flows to your taps or your central heating system. When this component fails, you'll notice either no hot water at the taps or cold radiators. You may also see the boiler cycling on and off without providing either service properly.
We replace these cartridges regularly across residential and light commercial installations. A professional diverter valve cartridge replacement usually takes around 60 minutes for a competent engineer. This guide explains how to identify a failure and how to perform the swap correctly. We'll cover everything from drainage steps to the final testing sequence.
What The Diverter Valve Actually Does
The diverter valve cartridge sits inside the valve body and redirects water flow based on system demand. When you open a hot tap, the internal piston shifts position. This sends heated water through the domestic hot water circuit. When you close the tap, it returns to heating mode.
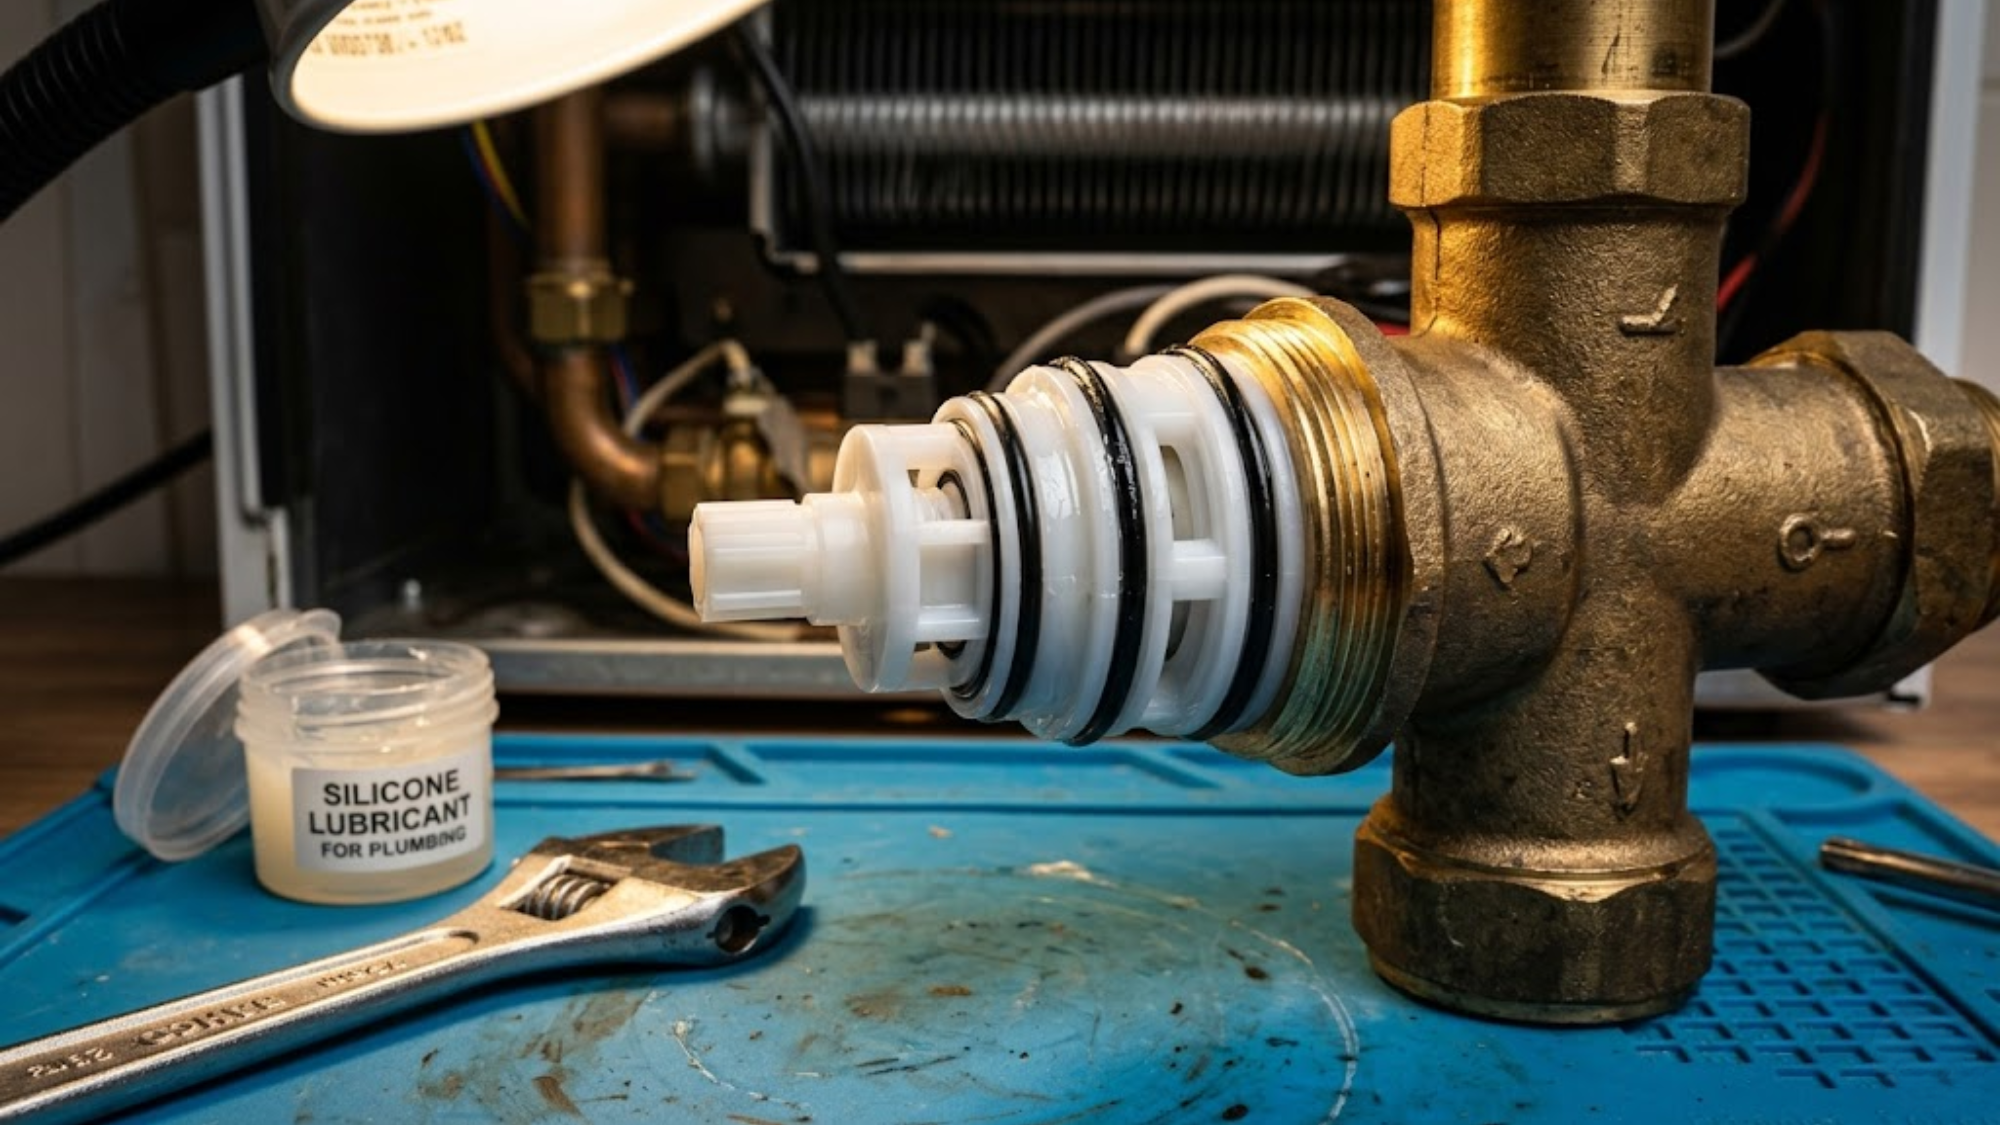
The cartridge contains a piston mechanism with several rubber seals. These seals deteriorate over time from constant temperature changes and water pressure. Hard water accelerates this wear significantly. Think of the diverter valve like a train track switch in a busy station. If the switch gets jammed with debris, the train can't reach the correct platform. Your boiler's energy is the train, and if the valve is stuck, the heat won't get where it needs to go.
Symptoms That Point To Cartridge Failure
There are several clear indicators that your valve is failing. If you have no hot water but the heating works normally, the cartridge is likely stuck in the heating position. The boiler fires correctly but cannot redirect flow to your taps. This indicates a complete hot water circuit bypass failure within the assembly.
You might also notice radiators going cold while taps are running. This suggests the cartridge shifts to hot water mode but won't return to the heating position. In some cases, a partial failure allows water to leak into both circuits at once. This results in a hot water circuit bypass that leaves you with lukewarm water and tepid radiators.
Tools And Parts You Need
You'll need specific equipment for this procedure to avoid damaging the unit. A set of 10mm and 22mm adjustable spanners is essential. You also require a medium flat-head screwdriver and a container for catching residual water. Ensure you have high-quality heating system components and a replacement cartridge ready before you begin.
Professional-grade lubricant is vital for a successful install. A proper silicone grease application ensures the seals slide into place without tearing. Verify the part number against your boiler's documentation before you start. Eden CBX models can vary depending on whether you have a standard or compact configuration.
Preparation Steps
Isolation is the first step for any combi boiler repair. Turn off the boiler at the control panel and at the electrical isolation switch. Wait at least 10 minutes for the internal components to cool. The valve body retains heat much longer than you might expect.
Close both the flow and return valves on your heating system. These usually sit beneath the boiler with red or blue handles. You must also close the cold water inlet valve. Open a hot tap at the highest point in the house to release the remaining pressure. This minimizes the amount of water that will spill during the diverter valve cartridge replacement.
Removing The Failed Cartridge
Locate the diverter valve on the right side of the heat exchanger assembly. It consists of a brass valve body with a plastic actuator motor attached to the top. Disconnect the motor by removing the mounting screw and lifting it straight up. If it resists, the shaft may have corroded to the internal assembly.
Use your 22mm spanner to unscrew the brass cap. Turn it anticlockwise and be prepared for a small amount of water to drain. Once the cap is removed, grip the cartridge firmly and pull it straight out. If it won't budge, the rubber seals have expanded from heat. You can use thin-nose pliers to grip the brass valve body internals more securely.
Installing The New Cartridge
Clean the interior of the valve housing before you install the replacement. Use a damp cloth to remove any scale or black sludge. You must perform a thorough silicone grease application on the new rubber seals. This helps the component slide into position and creates a better initial seal against the metal.
Insert the new cartridge straight into the housing. It only fits one way, so rotate it 180 degrees if you feel resistance. Push until it seats fully against the internal stop. Apply more grease to the cap threads and tighten it with your spanner. A correct silicone grease application prevents the cap from seizing in the future.
Reconnecting And Testing
Reattach the actuator motor coupling to the cartridge shaft. The shaft has a flat section that must align with the matching socket inside the motor. Secure the motor with its screw and ensure it sits flush against the bracket. You should check your heating controls to ensure the system is ready for a test run.
Open the water valves slowly and check for leaks around the cap. Refill the system to 1.5 bar and turn on the electrical supply. Start the boiler and demand heat for the radiators. Once they are warming, turn on a hot tap. You should hear the actuator motor coupling click as it shifts the water flow.
Common Installation Problems
On a recent project, a customer tried to perform a DIY diverter valve cartridge replacement but forgot to grease the seals. The dry rubber snagged on the metal housing and tore during installation. This caused a permanent leak that eventually damaged the electrics. Methodical preparation is the only way to ensure a reliable fix.
If the boiler won't switch between modes, check the actuator motor coupling alignment. Sometimes the motor fails alongside the cartridge. You should verify that your temperature control system is sending a clear signal to the boiler. If the motor doesn't move, you may need to replace the electrical unit as well.
Maintenance Advice
Annual servicing catches cartridge wear before it leads to a total failure. A technician can detect sluggish valve movement during a routine check. You might also consider checking your expansion vessel pre-charge while the system is drained. Maintaining stable pressure reduces the stress on all internal seals.
Installing a magnetic filter is another great way to protect your valves. It removes iron oxide particles that can jam the piston. This extends the life of the cartridge and prevents expensive second visits. Keeping your system water clean is the best way to avoid a premature diverter valve cartridge replacement.
Conclusion
Replacing a diverter valve cartridge is a straightforward task if you follow the correct protocol. By ensuring the seals are greased and the motor is aligned, you can restore full service quickly. Always prioritize safety by isolating the power and checking for leaks before you leave the site.
If you encounter a stuck component or an unidentified leak, you shouldn't force the parts. You can contact our technical team for expert advice on complex Halstead repairs. Heating and Plumbing World provides the professional parts and guidance needed to keep your heating system running all year round.