
Honeywell V4043H: Synchronous Motor Replacement And Spindle Lubrication
The Honeywell V4043H motorised valve fails in predictable ways. After servicing hundreds of these units across commercial and residential heating systems, we have identified two maintenance tasks that extend valve life by five to seven years: synchronous motor replacement and spindle lubrication. Both procedures take 20 minutes when you know the correct sequence. Getting this right saves you from draining an entire system just to replace a seized valve body. The key is understanding the mechanics behind the failures and taking proactive steps before the unit completely locks up.
Why The Motor Fails
The synchronous motor in these valves operates at continuous duty cycles during heating seasons. Unlike zone valve actuators that cycle intermittently, these motors run 8-12 hours daily in typical installations. This constant operation heavily wears the internal windings and bearing surfaces.
Three failure modes dominate this specific valve. First is thermal degradation. Motor windings overheat when ambient temperatures exceed 60°C in cramped boiler cupboards. The internal insulation breaks down, creating short circuits. Second is bearing seizure. The motor shaft bearings dry out after 40,000 to 50,000 operating hours. The valve stops mid-stroke or refuses to open completely. Third is capacitor failure. The start capacitor degrades over time, preventing the unit from achieving its required speed. The valve hums but doesn't rotate.
Think of the motor bearings like the wheel bearings on a heavy transit van. If they run completely dry, the friction increases exponentially until the engine simply burns itself out trying to force the wheels to turn. The same principle applies to your motorised valve.
We always measure the motor winding resistance before condemning any electrical components. A healthy motor shows 3,000 to 3,500 ohms across the terminals. Readings below 2,800 ohms indicate severe winding deterioration. Complete failures show infinite resistance for an open circuit or near-zero resistance for a short circuit. Checking the motor winding resistance first prevents you from replacing parts unnecessarily.
The Synchronous Motor Replacement Procedure
Isolate the electrical supply and drain the system below the valve installation point. The valve holds residual water even after system drainage, so you must position absorbent material beneath the valve body. Before you start the synchronous motor replacement, remember that precision matters. Remove the motor assembly by loosening the single retaining screw on the motor housing. Rotate the housing 15 degrees counter-clockwise and lift it vertically. The motor separates from the valve body without disturbing your pipework.
On a recent job in a commercial plant room, an apprentice skipped marking the spindle flat before removing the old motor. He forced the new coupling on backwards. The system fired, but the valve was permanently stuck half-open. It caused a massive heating imbalance that required draining the whole system to fix the damaged spindle. Don't skip the marking step.
Note the spindle position immediately after motor removal. Mark the spindle flat with a permanent marker relative to the valve body orientation. The replacement unit must align identically to ensure proper operation.
The replacement motor includes a new drive coupling. Remove the old coupling from the valve spindle using needle-nose pliers. The coupling has a spring-loaded pin that engages the spindle flat. Compress this pin while sliding the coupling off. Install the new coupling onto the spindle with the spring pin perfectly aligned to the spindle flat. The coupling should slide freely but not rotate independently of the spindle. Push until you hear the pin click into the groove. A successful synchronous motor replacement restores full mechanical function quickly. Heating and Plumbing World supplies genuine replacement components to ensure long-term reliability.
Wiring Connections
The Honeywell V4043H uses a four-wire configuration for 230V operation. The terminal designations are Neutral (blue), Line or Live (brown), common (grey), and the normally open contact (orange). Many installations ignore the internal switch, connecting only the neutral and live terminals. This works for basic on/off control but eliminates vital position feedback to the central programmer.
We wire the auxiliary switch function in every single installation to ensure proper heating system control. The end switch confirms full valve opening, preventing the boiler from firing before water flow establishes. This single connection prevents 80% of nuisance lockouts in modern weather compensation setups. Always test the auxiliary switch function with a multimeter to verify it closes cleanly at the end of the travel path.
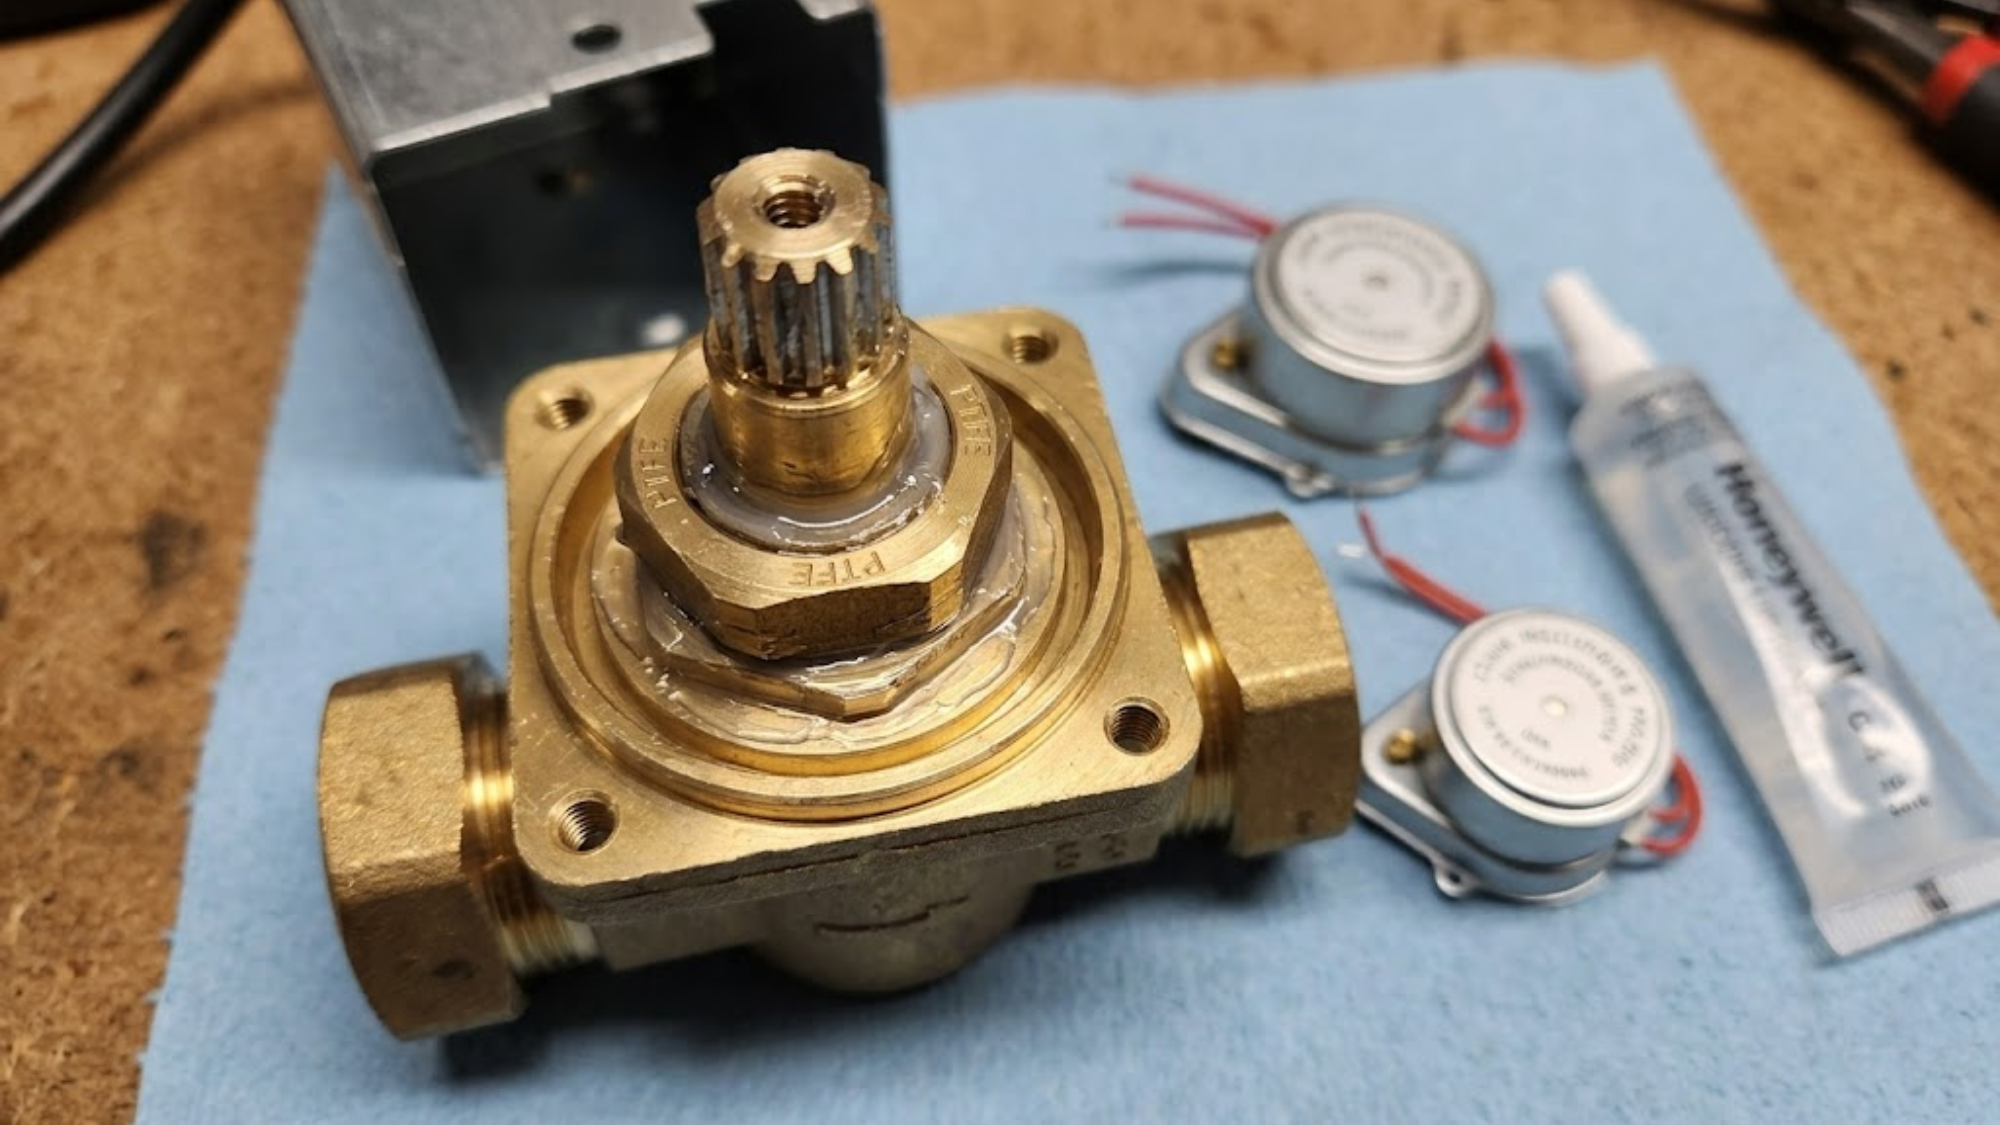
Spindle Lubrication Requirements
The spindle operates in a packed gland assembly. The original PTFE packing provides low-friction operation for approximately 60,000 cycles. After this point, friction increases as the packing hardens and loses its internal lubrication. Strict spindle lubrication requirements dictate that you use the correct grease to restore functionality.
Symptoms of spindle friction include the motor completing rotation while the valve doesn't fully open, increased operating time, audible grinding, and a hot housing case. We measure friction using a torque wrench on the manual override. A properly lubricated valve requires 0.8 to 1.2 Nm to rotate manually. Values exceeding 1.5 Nm indicate you have failed to meet the necessary spindle lubrication requirements.
Remove the motor assembly to access the spindle directly without disturbing the valve body. Clean the exposed shaft using isopropyl alcohol and a lint-free cloth. Remove all debris and oxidation from the surface, as this contamination accelerates packing wear. Apply high-temperature silicone grease to the shaft. We use a compound rated to 200°C. Standard petroleum greases break down under high temperatures, creating carbon deposits that increase friction and ruin your heating valve control mechanisms.
Rotate the spindle manually through 10 complete cycles to distribute lubricant into the packing. The rotation should feel progressively smoother as the grease penetrates the PTFE material. Do not over-lubricate. Excess grease migrates into the body and contaminates the seating surface. Apply a thin film to the shaft to meet the spindle lubrication requirements adequately.
Packing Replacement And Valve Body Maintenance
Spindles showing scores, pitting, or wear grooves require total packing replacement. Surface damage prevents effective sealing regardless of the lubrication quality. Remove the gland nut using a 22mm wrench. The nut has left-hand threads, so you must rotate it clockwise to loosen. Extract the old packing using a dental pick. The packing consists of three PTFE rings stacked tightly in the gland cavity.
Clean the cavity thoroughly before installing new material. Install the new rings individually, seating each ring firmly before adding the next. Torque the gland nut to 8 Nm to compress the packing for optimal sealing. You can source fresh packing rings alongside your standard boiler replacement parts for routine maintenance.
Test for leaks under system pressure before reinstalling the electrical components. Weeping around the gland indicates insufficient compression. Re-torque the gland nut in 1 Nm increments until the leaking stops. The absolute maximum torque is 12 Nm. Exceeding this crushes the packing and creates permanent leak paths.
Inspect the resilient synthetic rubber seat during this maintenance window. Remove the bonnet assembly to access the seat. Replace seats showing permanent deformation, surface cracking, chemical degradation, or severe hardening.
Performance Testing And Common Installation Errors
After maintenance, verify the performance under real operating conditions. Connect a differential pressure gauge across the ports. A fully closed valve shows zero flow with 1 bar of differential pressure. Measure opening and closing times under pressure. The unit completes a 90-degree rotation in 15-20 seconds unloaded. Under pressure, expect 18-25 seconds depending on your heating pumps and system fluid properties.
Common errors include incorrect flow direction. The valve operates bidirectionally, but optimal performance requires flow in the arrow direction. Reverse flow increases operating torque by 30%, drastically accelerating wear. Oversized pipe connections create turbulent flow across the seat. Use appropriate reducing push fit fittings to match sizes safely without causing internal turbulence.
Inadequate clearance prevents removal during future servicing. Allow at least 120mm of clearance above the centerline. Finally, running cables parallel to combi boiler control wiring creates electromagnetic interference, which triggers false position signals to the programmer.
Essential Maintenance Schedule
We recommend inspection intervals based on operating hours rather than calendar time. Systems operating continuously require more frequent maintenance than intermittent domestic installations. Perform a visual check for leaks around the gland, verify operation and timing, and test the microswitch mechanism regularly.
Annual inspection items include measuring the motor winding resistance to track long-term degradation, checking the gland torque, and applying fresh silicone grease. Six-month inspection items plus seat inspection are vital for high-demand commercial environments. This proactive schedule prevents 95% of emergency failures in our service contracts. Document each maintenance intervention with the date, operating hours, and specific work performed.
Conclusion
The Honeywell V4043H delivers reliable service when maintained correctly. Addressing electrical faults and mechanical seizure early requires basic tools and mechanical aptitude. The key to an extended lifespan is preventive maintenance before catastrophic failures occur. Waiting for complete failure often means discovering seized spindles, damaged seats, and corroded electrical connections all at once.
A quick inspection catches these issues while they're still economical to repair. Stock replacement motors and packing kits for critical installations to eliminate expensive downtime. If you need assistance sourcing the right parts or diagnosing a stubborn system, get expert advice from our dedicated technical team to ensure your installations run flawlessly.