
Installing and Maintaining Water Softeners
Water softeners play a vital role in improving your home’s plumbing by reducing the hardness of water and preventing scale buildup. This guide will walk you through the installation process, share maintenance tips, and offer practical advice based on real-life experiences. Whether you’re a DIY enthusiast or prefer professional installation, understanding water softening techniques can save you money and extend the life of your plumbing system.
Why Consider a Water Softener?
Hard water, characterised by high levels of minerals such as calcium and magnesium, can lead to limescale buildup in your pipes, appliances, and water heater. This build-up reduces the efficiency of your home plumbing and can result in costly repairs. Installing a water softener is a proactive solution that improves water quality, enhances appliance longevity, and ensures a smoother-running plumbing system. Adopting adequate water softening practices has transformed how many homeowners experience their water supply.
I recall a time when my appliances started underperforming due to hard water. After installing a water softener, I noticed significantly improved water quality and reduced limescale issues. This experience highlighted the value of investing in water softening solutions to protect your plumbing.
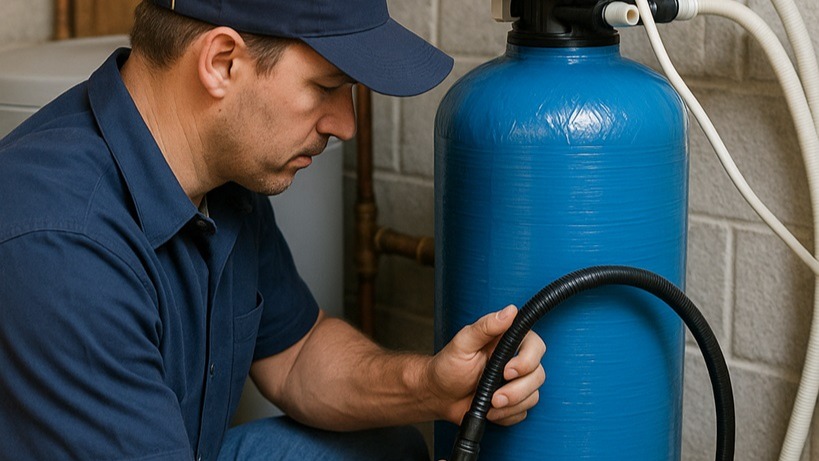
The Installation Process
Planning and Preparation
Before installing a water softener, assessing your home’s plumbing layout is essential. Identify the best location for the unit, usually near your main water supply line, so that all the water entering your home benefits from water softening. Ensure the area is well-ventilated and accessible for future maintenance.
Key planning steps include:
- Evaluating Your Water Quality: Testing your water to determine the hardness level is crucial for selecting the right capacity for your softener.
- Choosing the Right Unit: There are various water softener models available, ranging from traditional salt-based systems to salt-free alternatives. Research which option best meets your needs, budget, and environmental preferences.
- Gathering Tools and Materials: Essential tools include pipe wrenches, Teflon tape, and a unit mounting drill. Always refer to the manufacturer’s instructions for a complete list.
If you’re not comfortable with DIY installations, professional help is always available. However, with careful planning and an understanding of water softening principles, many homeowners successfully install their own units.
Step-by-Step Installation Guide
1. Shut Off the Water Supply
Start by turning off your home’s main water supply to prevent any accidental leaks during installation. Drain the remaining water from your pipes by opening the faucets.
2. Choose the Installation Site
Select a location close to the main water entry point, ensuring the unit is easily accessible for future maintenance. A dedicated space in your utility room or near the water meter is ideal.
3. Connect the Water Softener
Follow the manufacturer’s instructions to connect your water softener. This step usually involves cutting a section of pipe and fitting the unit’s inlet and outlet connections using high-quality fittings. Teflon tape applied to the threads helps achieve a secure, leak-free connection.
4. Configure the Control Settings
Modern water softeners come with digital controls or manual dials. Set the hardness level according to your water test results and adjust the regeneration cycle to suit your household water usage. Proper configuration is key for efficient water softening.
5. Restore the Water Supply and Test
Once installed, slowly turn the water back on and check all connections for leaks. Run a few gallons of water through the system to ensure it is operating correctly. Adjust settings as needed based on the unit’s performance.
You can find additional products and advice on our HOMEPAGE for further support during installation.
Maintenance Tips for a Long-Lasting System
Regular Maintenance Routines
Routine maintenance is essential to ensure that your water softener remains effective. Here are some key tasks:
Checking Salt Levels
For salt-based water softeners, regularly monitor the salt reservoir. Depending on your water usage and hardness levels, you might need to refill it every few weeks. Maintaining adequate salt levels is crucial for efficient water softening.
Cleaning the Brine Tank
Over time, impurities can build up in the brine tank. It’s advisable to clean the tank at least once a year. Follow the manufacturer’s guidelines to safely empty and clean the tank, ensuring optimal performance and consistent water softening.
Inspecting for Leaks or Damage
Periodically inspect the unit and the connected plumbing for any signs of leaks or wear. Addressing even small issues early on can prevent larger problems and ensure that your water softening system continues to function properly.
When to Schedule Professional Servicing
While many maintenance tasks can be handled independently, certain issues warrant professional attention:
- Persistent Leaks or Unusual Noises: These can indicate a malfunction in the softener, and professional servicing may be necessary.
- Complex Repairs: If internal components require replacement or repair, it’s best to consult a specialist.
- System Upgrades: Professional advice can help you select and integrate compatible components if you’re planning a home plumbing upgrade.
You might consider visiting pages like Pressure Relief Valves and Expansion Vessels for comprehensive maintenance services.
Benefits of a Well-Maintained Water Softener
Improved Appliance Efficiency
A properly maintained water softener reduces scale buildup on appliances such as washing machines, dishwashers, and water heaters. This extends their lifespan and ensures they operate at peak efficiency, saving energy and lowering costs.
Enhanced Water Quality
Effective water softening improves water quality, making it gentler on your skin and hair while maintaining the integrity of your plumbing system. Reducing mineral deposits allows you to enjoy clearer, cleaner water throughout your home.
Environmental and Economic Benefits
Reducing scale buildup means fewer repairs and replacements, leading to long-term savings. Additionally, efficient appliances consume less energy, contributing to a reduced carbon footprint, a benefit for your wallet and the environment.
Personal Experiences and Lessons Learned
During my early DIY projects, I attempted to install a water softener without fully appreciating the importance of thorough planning and regular maintenance. After encountering a few setbacks, I learned that a proactive approach, grounded in solid water softening practices, could save me time and money in the long run. Now, I schedule routine maintenance checks and, when necessary, enlist professional help to ensure that my water softener continues to operate smoothly.
Tips for a Successful DIY Installation
Research and Preparation
Before beginning your installation, research different water softener models and read customer reviews. Understanding common challenges and best practices related to water softening can boost your confidence and increase the chances of a successful DIY project.
Use Quality Materials
Invest in high-quality fittings and tools to ensure a secure installation. Cutting corners by using inferior components can lead to leaks or premature system failure, undermining your water softening efforts.
Follow a Step-by-Step Guide
Rely on detailed installation guides provided by the manufacturer, and don’t hesitate to seek advice from online forums or professionals if needed. Our HOMEPAGE offers further insights and product recommendations to support your project.
Know When to Ask for Help
Contact a professional plumber if you’re unsure about any aspect of the installation. Even a brief consultation can prevent costly mistakes and ensure that your water softener is installed correctly.
Integrating Your Water Softener into Your Home Plumbing
Connecting with Other Systems
A water softener is a key component of your overall home plumbing system. Integrating effectively with your water treatment and heating solutions enhances water quality and boosts appliance efficiency. For example, pairing a water softener with regular boiler system servicing ensures that water softening is working in harmony with your home’s heating setup.
For more integrated solutions, consider exploring products like Worcester Bosch Boiler Spares to maintain optimal performance in your heating system, or check out Kingspan Ferham Tanks for reliable water storage options.
Routine Checks and Continuous Improvement
Regular maintenance and periodic upgrades ensure your water softening system operates without interruption. A proactive approach not only safeguards against unexpected failures but also optimises overall performance, ensuring that your water remains soft and your appliances continue to run efficiently.
Final Thoughts: A Wise Investment for Your Home
Installing and maintaining a water softener is a wise investment in your home’s future. By implementing effective water softening techniques, you protect your plumbing, enhance appliance longevity, and enjoy the benefits of improved water quality. Whether you install the system yourself or enlist professional help, careful planning, quality components, and regular maintenance are essential to long-term success.
Taking these steps can prevent the inconveniences of hard water and ensure that your home plumbing system continues to serve you efficiently for years to come. For more detailed advice, product information, and expert guidance on all aspects of home plumbing, visit our HOMEPAGE.