
Sealed System Installation Sequencing: Component Order for First-Time Fill
Getting a sealed refrigeration system up and running isn't like assembling flat-pack furniture. You cannot just throw the pieces together and hope for the best. The sequence matters immensely. Over the years, we have seen plenty of first-time installations fail simply because someone rushed through the process or skipped a critical step.
Proper sealed system installation sequencing is about understanding that a sealed environment must stay completely isolated. Once you have charged the system and brazed it shut, you cannot easily pop it open to fix a mistake. This strict sequence creates the clean, dry, and stable environment your refrigerant needs to do its job properly.
Why Sequence Matters in Sealed Systems
A sealed refrigeration system operates under highly precise conditions. The refrigerant circulates through components that must remain absolutely free from moisture, air, and contaminants. If you introduce any of these elements during the installation, you are setting up future failures.
Think of a sealed system installation like baking a complex cake. You cannot simply throw all the raw ingredients into a tin, bake it, and expect it to rise. You must mix the dry ingredients, cream the butter, and fold in the flour in a very specific order to create the perfect chemical reaction. Similarly, your system requires a precise operational order to function. Heating and Plumbing World supplies the professional-grade tools and components you need to execute this sequence flawlessly.
The compressor is extremely unforgiving because it is designed exclusively to compress refrigerant vapour rather than air or moisture. Getting this wrong leads to serious issues:
- Moisture causes acid formation that rapidly eats away at internal windings and bearings.
- Trapped air leaves non-condensable gases that wreck your pressures and overall cooling capacity.
Pre-Installation Component Preparation
Before you even pick up a torch, you must sort out your components. This is not the most exciting part of the job, but it is exactly where many problems start. Follow these essential preparation steps:
- Check for shipping damage: Compressors should arrive with tightly sealed ports. If those seals are broken, you must assume contamination has already occurred.
- Keep connections capped: For instance, if you are unboxing a new Worcester 10-plate heat exchanger, ensure the connection points remain completely capped until you are ready to pipe them in.
- Store materials properly: Never leave copper tubing lying around without caps. Moisture and debris will inevitably find their way inside.
- Use positive pressure: Keep components pressurised with dry nitrogen to create a positive pressure that keeps contaminants out.
The Correct Brazing Sequence
Brazing is where the system truly becomes sealed. It is also where you can either lock in high quality or trap mechanical problems forever. You must always flow nitrogen while brazing. This single step prevents the oxide scale formation that causes more system failures than almost anything else.
Set your nitrogen flow to just enough to displace oxygen without causing turbulence that affects your braze quality. Start with the low-side components first. This lets you practice on lower-pressure joints before moving to the critical high-side work. The compressor suction line comes next, followed directly by the discharge connections.
Leave your service ports until last because you will need these for leak testing, evacuation, and charging. Between brazing operations, you must maintain that nitrogen flow continuously. Do not braze one joint, shut off the nitrogen, and take a break. Each break in nitrogen coverage is an open invitation for oxidation.
Pressure Testing Protocol
Once your brazed joints have cooled down, it is time for pressure testing. If you skip this step, you will likely discover leaks during evacuation when you have already invested hours into the job.
On a major commercial job last year, an apprentice rushed the assembly and completely skipped the dry nitrogen pressure test. He moved straight to evacuation and charging, only to discover a massive leak at the main suction valve. We had to recover the entire charge and start over, which cost the company a full day of wasted labour.
Always perform a thorough dry nitrogen pressure test to 150% of the system's working pressure, holding it for at least 30 minutes. This step is especially critical when connecting auxiliary loops to an AIC Nesta 100kW condensing boiler or similar large-scale equipment. Mark every single joint with leak detection fluid. Finally, remember that overnight pressure tests are highly recommended for commercial setups to catch very slow leaks.
The Evacuation Process
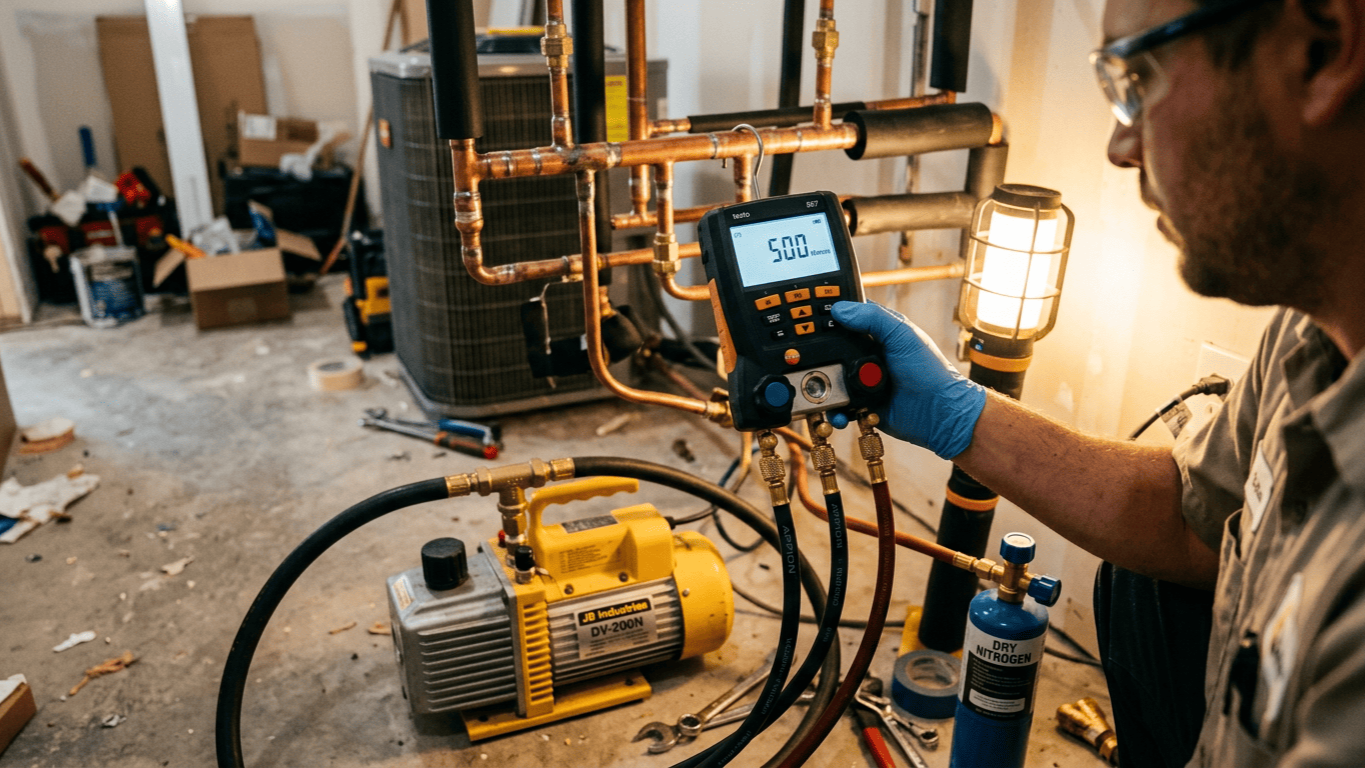
Evacuation physically removes air and moisture from your sealed system. It is not optional, you cannot rush it, and you definitely cannot fake it with a quick vacuum pull. Connect your vacuum pump to both the high and low side service ports if possible. You must use proper vacuum-rated hoses because standard charging hoses leak like sieves under a deep vacuum.
Start your pump and watch the gauge closely. You are aiming for 500 microns or lower. Most standard gauge sets will not read this accurately, so you must invest in a proper digital micron gauge if you are doing this regularly.
The triple evacuation method remains the absolute gold standard for first-time fills. First, pull down to 500 microns. Next, break the vacuum with dry nitrogen to atmospheric pressure. Finally, evacuate the system again. Repeat this process three times to ensure genuine dryness.
Moisture Removal Verification
How do you know your system is actually dry? Hoping simply does not count. The decay test tells you what is really happening inside that pipework.
Once you have reached 500 microns, isolate the system from your vacuum pump and watch your micron gauge carefully. If the pressure rises rapidly above 1000 microns, you still have moisture outgassing. If it holds steady, you are good to proceed.
Filter driers are not a substitute for proper evacuation. They will catch the tiny bits of moisture you missed, but they have a strictly finite filter drier capacity. If you overload that filter drier capacity with water from sloppy evacuation work, the core will saturate quickly and cause internal restrictions. Use them as insurance rather than your primary moisture removal method.
Refrigerant Charging Sequence
You now have a clean, dry, leak-free system under a deep vacuum. Now comes the moment where you actually introduce the refrigerant. Always break your vacuum with refrigerant vapour first, rather than liquid.
Connect your charging cylinder to the low-side port and crack it open very slowly. Watch your gauge rise to atmospheric pressure. This initial charge of refrigerant vapour gently displaces any last traces of air while safely starting to fill the system.
For the bulk of your charge, liquid charging through the high side with the system off is generally fastest. However, you must always weigh your charge with a digital scale rather than relying on gauge pressures alone.
Component Startup Order
With refrigerant in the system, you are ready to bring everything online. Follow this exact sequence to prevent component damage:
- Energise the condenser fan first: Do this if it is separately controlled. This ensures you have heat rejection capacity ready before the compressor starts pushing hot gas. If you are integrating external ventilation such as a Worcester boiler fan assembly, ensure it is running smoothly before proceeding.
- Start the compressor next: Watch your gauges closely. You should see the suction pressure drop and the discharge pressure rise immediately.
- Bring the evaporator fan online last: Starting it too early can cause the evaporator to ice up before the system physically stabilises.
Final System Checks
Your system is running, but you are not done yet. You must perform several vital checks to ensure long-term reliability:
- Check temperatures: Verify that the superheat and subcooling match the manufacturer's exact specifications. These measurements tell you whether your charge is correct far more accurately than gauge pressures alone.
- Monitor electrical draw: Check the amperage draw on the compressor to ensure it falls within the nameplate range.
- Walk the entire system: Check for abnormal temperatures, sounds, or vibrations. Ensure auxiliary safety devices like an oxygen depletion pilot are completely undisturbed by surrounding pipework vibrations.
- Document everything: Record the charge weight, pressures, temperatures, and amperage. This baseline data becomes invaluable for future service calls.
Common Sequencing Mistakes
We have seen every shortcut and every mistake over the years. Here are the ones that cause the most grief:
- Charging before evacuation: You cannot push air out with refrigerant. You will end up with non-condensable gases and eventual system damage.
- Brazing without nitrogen: This creates an oxide scale that breaks loose, clogs expansion devices, and ruins compressor valves.
- Skipping the pressure test: Discovering leaks after charging means you are venting refrigerant and starting over. Trying to diagnose a poorly sequenced system later using an RF wireless combi pack 4 will only highlight the erratic performance caused by these shortcuts.
Long-Term Performance Considerations
A properly executed sealed system installation sequencing protocol sets up years of reliable operation. If you cut corners now, you will absolutely pay for it later.
The moisture you leave inside during installation does not just disappear. It circulates through the system, saturates your filter drier, and forms highly corrosive acids. By the time you see the physical effects, the severe mechanical damage is already done. Furthermore, air trapped during poor evacuation creates permanently elevated pressures. This means your system works much harder while delivering less cooling capacity.
Conclusion
Sealed system installation sequencing isn't about being pedantic. It is about respecting the strict physics of refrigeration and the realities of sealed components. Each step prepares the system for the next, building toward a clean, dry, properly charged installation that will run reliably for years.
The component order matters because you cannot fix mistakes easily once the system is fully sealed and charged. Proper preparation prevents contamination, correct brazing stops oxide formation, and thorough pressure testing catches leaks early. Deep evacuation removes moisture using the triple evacuation method, while systematic startup prevents damage during those critical first minutes of operation. If you require expert guidance or specific components for your next project, please contact our technical team for professional advice.