
Vacuum Gauges for Heating System Diagnosis
When a sealed heating system loses pressure overnight, develops cold spots across multiple radiators, or trips the boiler repeatedly on low-pressure faults, most engineers reach for a pressure gauge and start hunting for visible leaks. But what happens when you've checked every joint, replaced suspect valves, and the system still bleeds pressure like a sieve? That's when a vacuum gauge becomes the most valuable diagnostic tool in your kit.
Vacuum gauges measure negative pressure testing, the absence of atmospheric pressure, which reveals problems that standard pressure testing simply can't detect. Microcracks in heat exchangers, pinhole leaks in buried pipework, and faulty automatic air vents all become visible when you pull a vacuum on a system. For heating engineers working on commercial installations or troubleshooting persistent domestic faults, understanding vacuum testing procedure separates guesswork from precision diagnosis.
Why Vacuum Testing Reveals Hidden System Faults
Standard pressure testing pumps a system up to 10 bar or higher and monitors for pressure drop. It's effective for finding major leaks: burst pipes, loose compression fittings, failed radiator valves. But it misses the small stuff. A hairline crack in a heat exchanger pinhole might weep slightly under pressure but seal itself when the system cools. Microscopic porosity in a brazed joint might allow air infiltration without showing any water loss during a pressure test.
Vacuum testing procedure works in reverse. Instead of pushing water or air into the system, you evacuate it down to a deep vacuum, typically 25-28 inches of mercury (inHg) or around -0.85 to -0.95 bar using negative pressure testing. At this negative pressure, even the tiniest leak becomes a pathway for atmospheric air to rush back in. The vacuum gauge shows this immediately as a rise in pressure (or fall in vacuum depth, depending on how you read the scale).
The beauty of this approach is its sensitivity through microleak detection. A leak that loses 0.1 bar over 24 hours under pressure testing (often dismissed as "acceptable") will break a vacuum in minutes. You're not waiting overnight with a torch, crawling through ceiling voids, or second-guessing whether that slight pressure drop is real or just temperature-related. The vacuum gauge gives you a binary answer: the system holds vacuum, or it doesn't. That's professional microleak detection at work.
For comprehensive diagnostic equipment across all heating applications, Heating and Plumbing World stocks the vacuum gauges and testing equipment that professional engineers rely on.
How Vacuum Gauges Work in HVAC Diagnostics
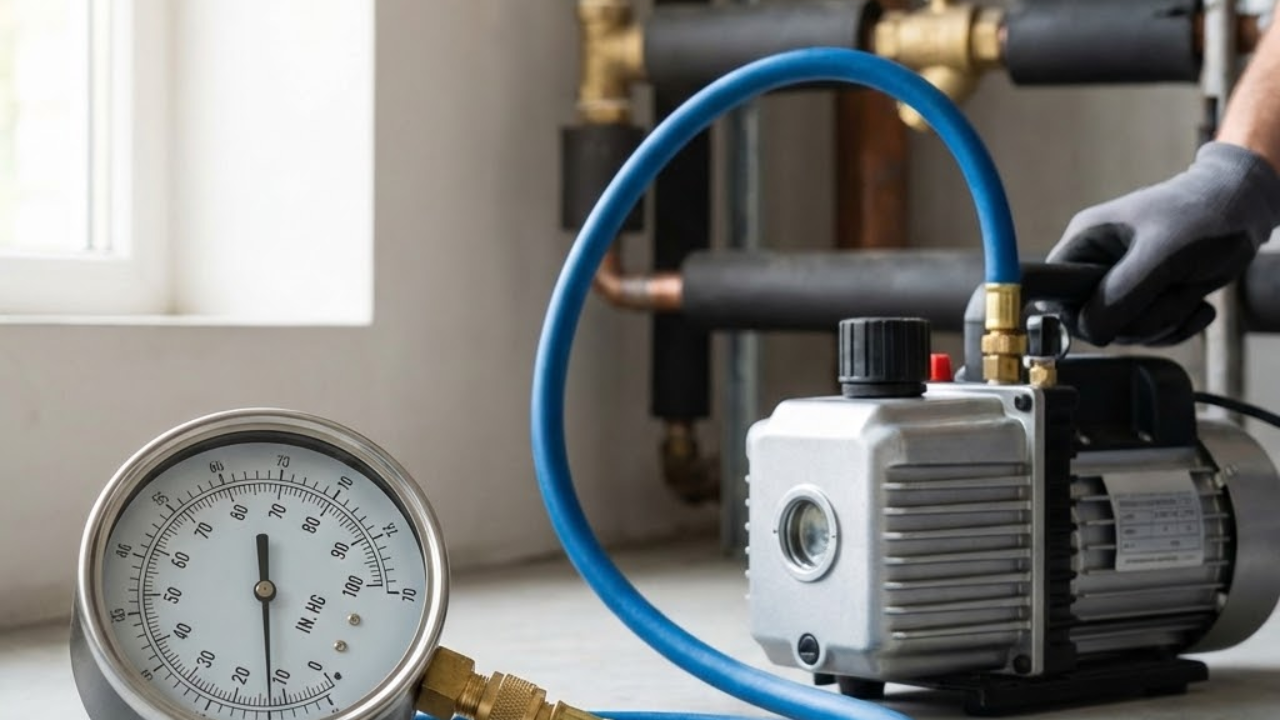
A vacuum gauge measures the pressure of gases below atmospheric pressure. Most HVAC vacuum gauges use either a Bourdon tube mechanism (mechanical) or a digital sensor (electronic). Mechanical gauges are robust, require no batteries, and work reliably in cold plant rooms. Digital gauges offer higher precision, easier reading in poor light, and often include data logging for commercial commissioning work.
The scale typically reads in inches of mercury (inHg) or millibar (mbar). A perfect vacuum at sea level is 29.92 inHg or -1013 mbar. In practice, a good vacuum pump selection on a small heating system should pull down to 28 inHg within 10-15 minutes. If you can't reach 25 inHg, you've got a leak, or your pump isn't up to the job.
Here's how a typical vacuum testing procedure works. Isolate the section you're testing by closing valves to separate the system into manageable zones. Connect your vacuum pump and gauge to a drain valve or test point. Open the pump and watch the gauge drop as air is evacuated. Once you hit your target vacuum (usually 28 inHg), close the isolation valve to the pump. Monitor the gauge for 15-30 minutes. Any rise indicates a leak.
If the vacuum holds steady, the system is tight. If it rises slowly, you've got a small leak. If it rises rapidly, you've got a significant fault. The rate of rise tells you how urgent the problem is and guides your microleak detection strategy.
Common Heating System Faults Vacuum Testing Uncovers
A corroded heat exchanger with a heat exchanger pinhole leak might pass a standard pressure test because the leak is so small that capillary action or surface tension prevents water escaping under static pressure. But under negative pressure testing, air is drawn through that same hole. This is particularly common in older cast-iron boilers where internal corrosion creates porosity that's invisible from outside.
One site visit involved a 15-year-old commercial boiler that kept losing pressure, maybe 0.3 bar per week. Pressure testing showed nothing. A vacuum testing procedure pulled down to 20 inHg but climbed back to 5 inHg within 10 minutes. The heat exchanger had developed microscopic cracks along a welded seam. Replacing it solved months of top-up visits. That's microleak detection revealing faults that conventional testing misses completely.
For pump and circulator installations where system integrity is critical, Grundfos equipment benefits from vacuum testing to ensure leak-free operation from commissioning onwards.
Underfloor heating circuits, pipes chased into walls, or runs buried in screed are impossible to inspect visually. Pressure testing might show a slow leak, but pinpointing it means cutting into floors or walls at random. Vacuum testing procedure at least confirms whether the leak is in the buried section or elsewhere. If you isolate the manifold and the buried loops hold vacuum, you know the fault is in the visible pipework or the boiler itself.
This negative pressure testing approach saves thousands in unnecessary destructive investigation. Instead of ripping up three rooms worth of flooring hoping to find the leak, you can narrow it down to a specific circuit or eliminate buried pipework entirely from your investigation.
Automatic air vents (AAVs) are designed to release air but seal against water. When the internal float mechanism fails, they can allow air infiltration under negative pressure testing conditions. This shows up as a vacuum that drops slowly over 20-30 minutes. Isolate the AAV, retest with vacuum testing procedure, and if the vacuum holds, you've found your culprit through effective microleak detection.
A split diaphragm in an expansion vessel allows water to cross into the air chamber. Under vacuum testing procedure, this can show as a slow vacuum loss because the compromised diaphragm allows air to migrate. It's not always obvious during pressure testing because the vessel still cushions pressure spikes, it just does it inefficiently.
Choosing the Right Vacuum Gauge for Heating Work
Not all vacuum gauges are created equal. Refrigeration engineers use high-precision micron gauges because AC systems demand deep vacuums (500 microns or less) to remove moisture. Heating systems don't need that level of precision. You're looking for gross leaks, not trace moisture. A standard compound gauge reading 0-30 inches of mercury in 1 inHg increments is perfectly adequate.
Key features to look for in vacuum gauges include dual scale (inHg and mbar for flexibility), liquid-filled case (dampens needle vibration and protects internals from shock), bottom or back connection (bottom-mount gauges are easier to read when the gauge is upright on the floor), and 1/4" BSP thread (matches most vacuum pump hoses and test adaptors).
Digital vacuum gauges offer advantages for commercial work: data logging, peak hold functions, and backlit displays. But for day-to-day domestic diagnostics, a quality analogue gauge is faster, more reliable, and doesn't need charging. You can pick one up, use it in a freezing loft, and trust the reading instantly.
For systems requiring sophisticated control and monitoring, brands like Danfoss offer comprehensive solutions that complement vacuum testing with ongoing system performance monitoring.
Step-by-Step Vacuum Testing Procedure
Let's walk through a proper vacuum testing procedure on a sealed heating system that's losing pressure but showing no visible leaks.
You don't need to drain it completely, just enough to ensure no water reaches the vacuum pump selection. Lower the system pressure to around 0.5 bar. This prevents water being drawn into the pump when you start evacuation.
Use a drain valve or service port. Most vacuum pumps have a 1/4" SAE flare connection, so you'll need an adaptor to 1/4" BSP for heating system fittings. Make sure all connections are tight. Any leak here will give you a false reading during negative pressure testing.
Start the pump and watch the gauge. It should drop steadily. On a small domestic system (100-150 litres), you should reach 25 inches of mercury within 10 minutes. Larger systems take longer. If progress stalls around 15-20 inHg, you've either got a significant leak or the pump isn't powerful enough for microleak detection work.
For expansion vessel and pressurisation applications where leak-free operation is essential, Altecnic Ltd equipment requires proper vacuum testing during installation to ensure system integrity.
Once you hit 28 inHg, close the valve between the pump and the system. Turn off the pump. Watch the gauge for 15-30 minutes. A rise of more than 2 inHg in 15 minutes indicates a leak. Less than 1 inHg over 30 minutes is acceptable. Some rise is normal due to outgassing from pipework or residual moisture.
If the vacuum holds steady, the system is tight. A slow rise (1-3 inHg over 30 mins) suggests a minor leak, possibly a valve gland or AAV. A rapid rise (5+ inHg in 10 mins) means a significant leak requiring immediate attention.
If the vacuum testing procedure fails, pressurise the system with air or nitrogen to 3-4 bar and use soapy water or a leak detector spray to pinpoint the fault. The vacuum test tells you there's a problem; pressure testing with tracer gas or soap solution tells you where.
Vacuum Pump Selection for Heating Engineers
You don't need a £500 two-stage refrigeration pump for heating work. A single-stage rotary vane pump with a free air displacement of 50-70 litres per minute is more than adequate for systems up to 300 litres. Look for a pump that reaches an ultimate vacuum of at least 50 microns (around 29.9 inHg). This gives you headroom even if the pump is slightly worn.
Practical features that matter for vacuum pump selection include an oil sight glass (lets you check oil level and condition without opening the pump), gas ballast valve (helps evacuate moisture without contaminating the pump oil), and anti-suckback valve (prevents oil being drawn back into the system if you forget to close the isolation valve).
Brands like Yellow Jacket, Robinair, and CPS all make reliable single-stage pumps suitable for heating diagnostics. Budget £150-£250 for a quality unit that'll last years. Cheaper pumps often fail to reach deep vacuum or burn out after a few dozen uses.
When Vacuum Testing Isn't Enough
Vacuum testing procedure is brilliant for finding leaks, but it won't tell you everything. It won't show you whether your circulator is cavitating, whether your system has hydraulic imbalances, or whether your boiler is short-cycling due to oversizing. It's one tool in a diagnostic process, not a magic bullet.
If a system holds vacuum but still loses pressure during operation, you're likely dealing with a temperature-related issue. Thermal expansion stressing a joint, a valve that leaks only when hot, or a pump seal that fails under operating pressure. In these cases, you need to run the system at temperature and use a pressure logger to capture the fault as it happens.
Similarly, if you're diagnosing poor heat distribution (some radiators hot, others cold), vacuum testing procedure won't help. That's a flow and balancing issue requiring differential pressure measurement and lockshield adjustment.
For systems requiring sophisticated zone control and flow management, brands like Honeywell offer control solutions that help you diagnose and resolve hydraulic balancing issues that vacuum testing can't address.
Real-World Scenario: The System That Wouldn't Hold Pressure
A facilities manager called about a light commercial heating system in a two-storey office building. The system lost 0.5 bar every three days. The maintenance contractor had pressure-tested it twice, replaced half a dozen radiator valves, and even swapped the expansion vessel. Nothing worked. The boiler kept locking out on low pressure, and the building was cold every Monday morning.
A vacuum testing procedure told the story in 15 minutes. The system pulled down to 20 inches of mercury but climbed back to 10 inHg within five minutes. That's a significant leak. But where? Pressure testing with nitrogen and a leak detector spray found nothing. The breakthrough came when someone noticed the boiler's condensate trap had been refilled with water three times in two weeks, far more than normal combustion would produce.
The heat exchanger had a heat exchanger pinhole leak. Under normal operating pressure, water seeped into the combustion chamber so slowly it simply evaporated or drained via the condensate trap. Under negative pressure testing, air was sucked through the same hole, breaking the vacuum instantly. Replacing the heat exchanger solved the problem. Without vacuum testing procedure and proper microleak detection, that fault could have taken weeks to find.
Integrating Vacuum Testing into Your Diagnostic Workflow
Vacuum testing procedure shouldn't be your first step. It's too time-consuming for obvious faults. Start with visual inspection, check the obvious stuff (PRV discharge, pump seals, valve glands), and run a basic pressure test. If the system fails a pressure test but you can't find the leak, that's when you reach for the vacuum gauge and begin systematic microleak detection.
For new installations or major refurbishments, vacuum testing procedure during commissioning catches problems before the system goes live. It's particularly valuable on underfloor heating installs where you've got dozens of joints buried in screed. A vacuum test before pouring the floor gives you confidence that everything is tight using negative pressure testing. A leak discovered six months later means cutting into a finished floor, expensive and disruptive.
On commercial sites, vacuum testing procedure is often specified in commissioning schedules for systems over a certain size. It's worth investing in a quality vacuum gauge and pump if you're doing regular commercial work. The time saved on fault-finding pays for the equipment within a few jobs.
Maintaining Your Vacuum Gauge and Pump
Vacuum gauges are robust, but they need care. The Bourdon tube inside a mechanical gauge is delicate. Drop the gauge onto concrete and you'll likely bend it, giving false readings forever. Store gauges in a protective case, and never leave them lying loose in a toolbox.
Vacuum pump selection maintenance is straightforward. Check oil level before every use (low oil reduces vacuum depth and damages the pump). Change oil after every 10-15 hours of use (contaminated oil loses its sealing properties). Run the pump with the gas ballast open for five minutes after evacuating damp systems (this purges moisture from the oil). Store the pump with the inlet capped (prevents dust and debris entering the pump chamber).
A well-maintained pump will pull the same vacuum after 200 hours as it did when new. A neglected pump loses performance within a season and costs more to replace than the oil changes would have cost.
Conclusion
Vacuum gauges transform heating system diagnostics from educated guesswork into precise fault-finding through systematic microleak detection. When pressure testing fails to locate a persistent leak, when a system loses pressure overnight with no visible water loss, or when you need to prove a newly installed system is completely tight before handover, vacuum testing procedure gives you answers that no other method can provide.
The technique is simple. Evacuate the system down to 25-28 inches of mercury, monitor the gauge, interpret the rate of vacuum loss. The equipment is affordable. A quality gauge and single-stage pump cost less than a day's labour wasted chasing phantom leaks. And the results are definitive. A system either holds vacuum or it doesn't.
For heating engineers serious about diagnostic work, vacuum testing procedure isn't optional equipment. It's as fundamental as a multimeter or a pressure gauge. It reveals the faults that waste your time, frustrate your customers, and damage your reputation through effective microleak detection and negative pressure testing. Master vacuum testing, and you'll solve problems other engineers walk away from. That's the difference between being the engineer who patches problems and the one who actually fixes them.
Heat exchanger pinhole leaks, buried pipework faults, failed AAVs, and compromised expansion vessel diaphragms all reveal themselves under the scrutiny of proper vacuum testing procedure. The inches of mercury scale on your vacuum gauge becomes a diagnostic window showing you leaks invisible to every other testing method.
If you're ready to add vacuum testing to your diagnostic toolkit, contact us for guidance on vacuum pump selection and selecting the right equipment for your type of work. The investment pays for itself the first time you find a leak that's defeated everyone else.